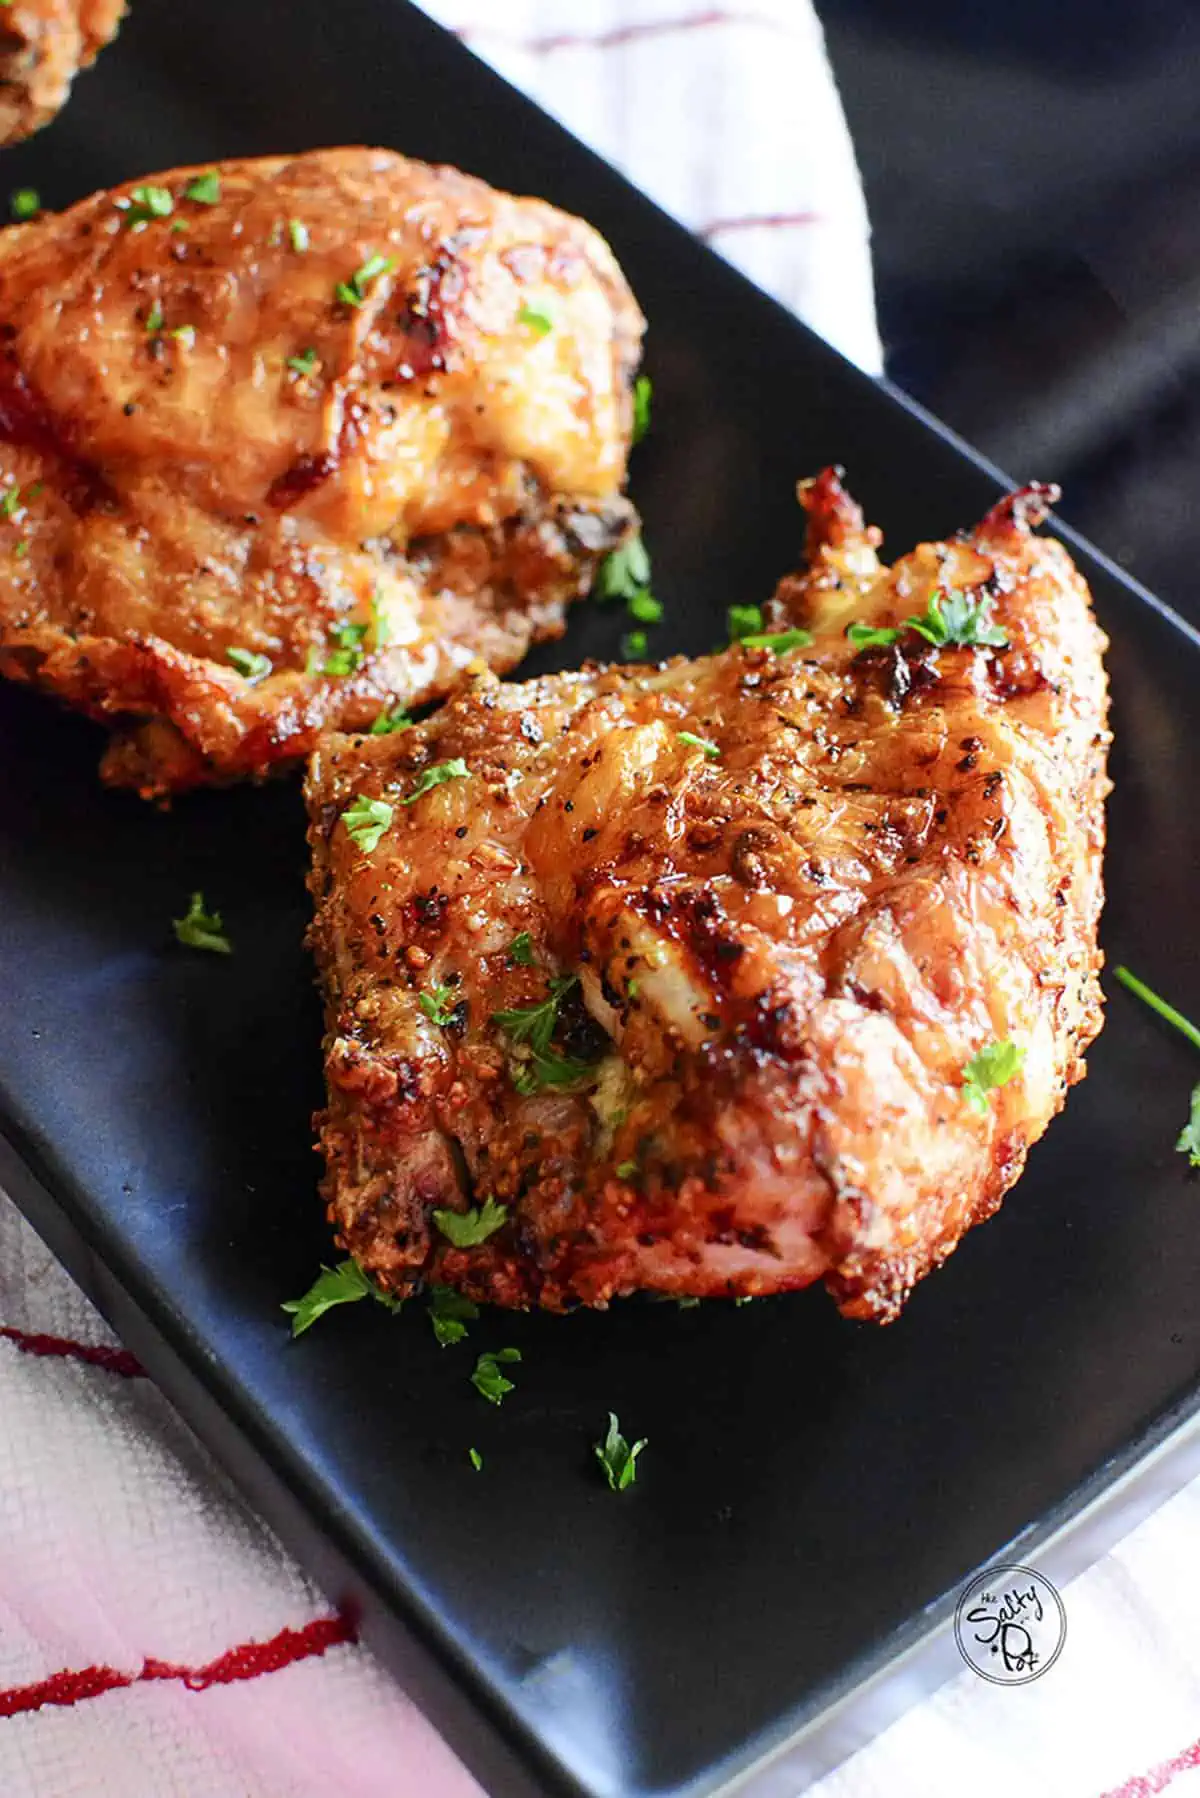
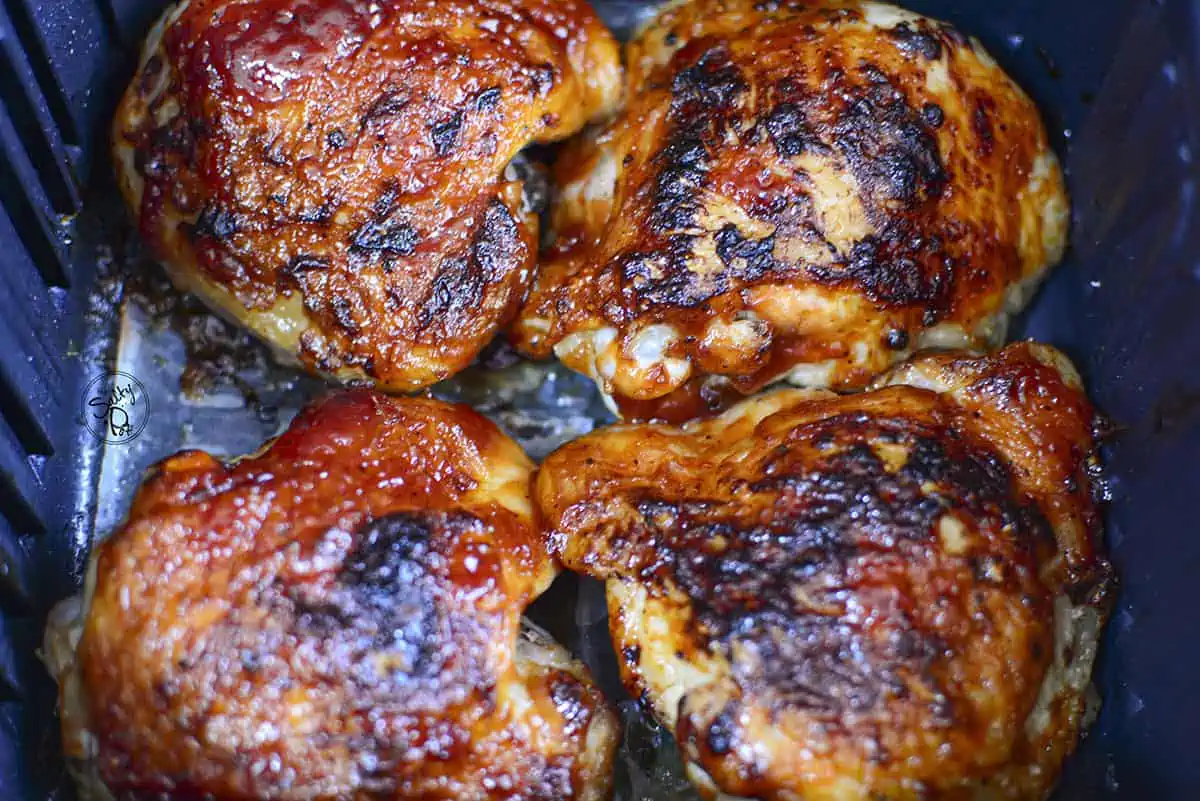
Air Fryer Bone-In Chicken Breast
Air Fryer Bone-In Chicken Breasts are savory and insanely juicy with an outside crust that is delightfully crispy.
Cooking chicken breast on the bone lends incredible flavor to the chicken while not overcooking or drying it out. Oh, and it’s all done from the kitchen to the table in about 30 minutes.
Why I Love This Air Fryer Bone-In Chicken Breast Recipe
I love juicy and flavorful chicken breasts, don’t you? This air fryer chicken breast is one of my favorite ways to cook weeknight dinners (my Air Fryer BBQ Chicken Thighs being another favorite way) because they take only a few simple steps to make and always come out perfectly in around thirty minutes.
Cooking chicken breasts in the air fryer is an easy roasting option that can give you a juicy chicken breast with crispy skin and a ‘deep-fried’ flavor without the greasiness, and extra calories, making it a healthy way to enjoy your favorite comfort foods.
Ingredients And Variations
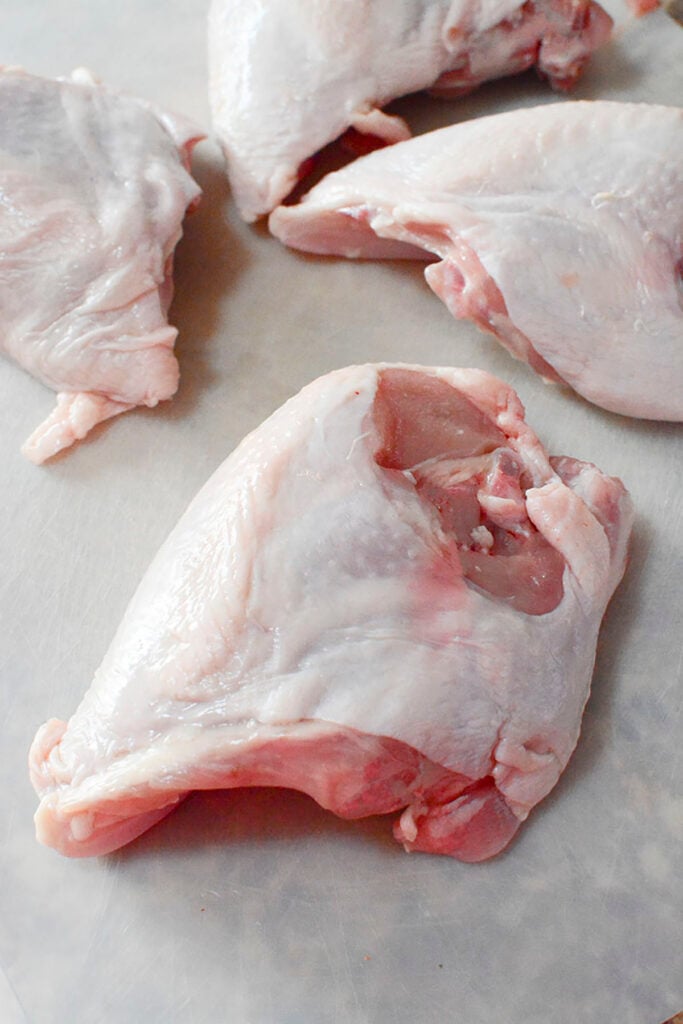
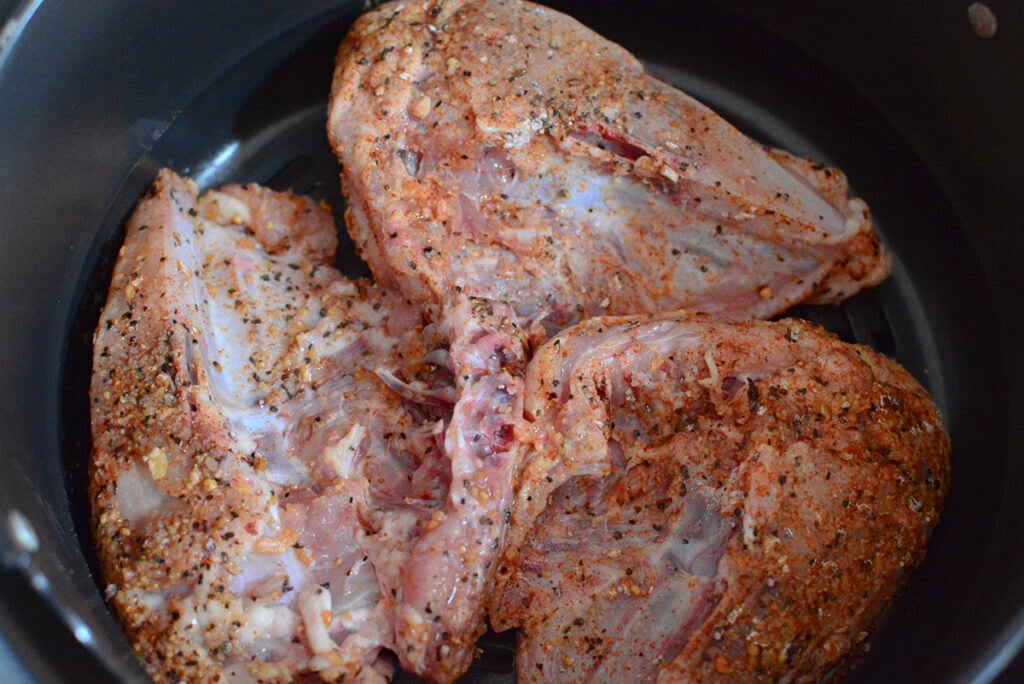
- Bone-in Chicken Breasts – Split chicken breast that is still on the bone is going to ensure you have flavorful chicken dinners. Be sure to purchase chicken breasts with the skin on because air frying makes it insanely crispy!
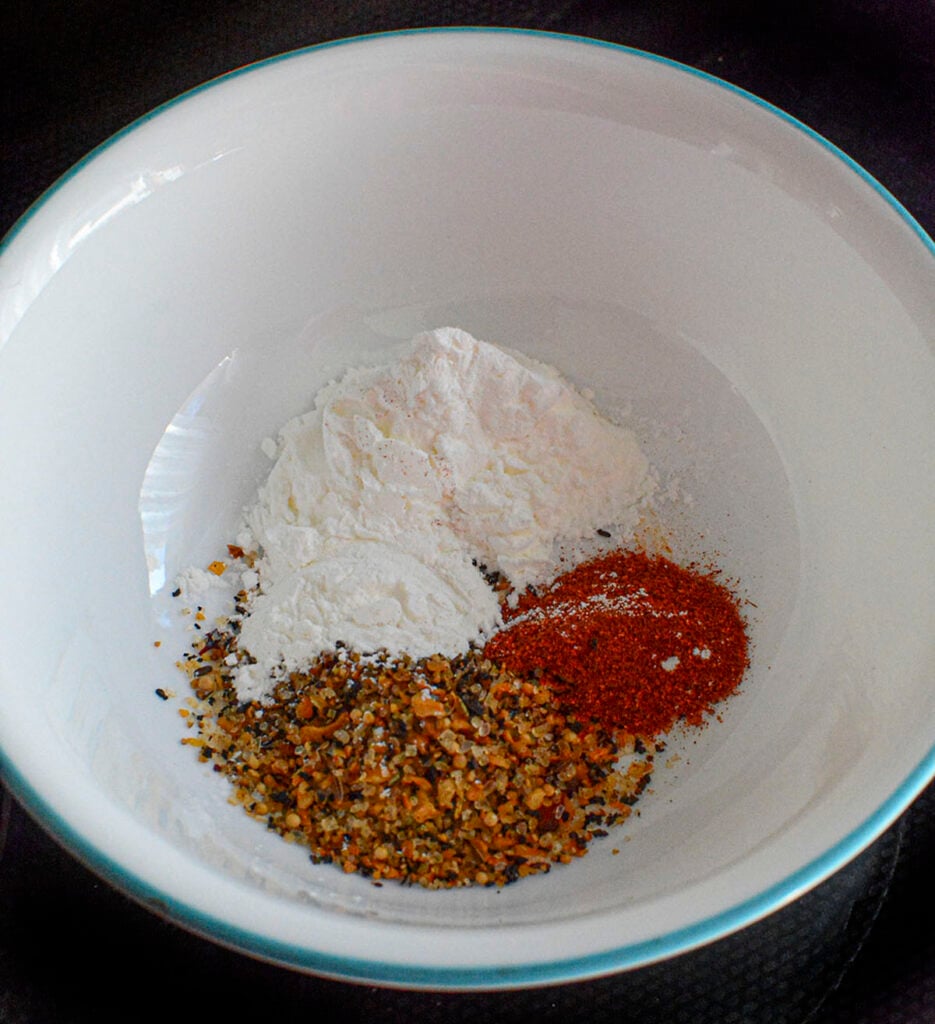
- Montreal Chicken Seasoning – I consider this your one-stop shop for a chicken seasoning blend. Check below in the question section for other seasoning alternatives.
- Cornstarch – this helps make the chicken super duper crispy!
- Smoked Paprika – Smoked paprika is not spicy and it helps achieve that grilled flavor without using the grill.
The complete printable recipe with measured ingredients and cooking directions is below in the recipe card.
How To Make Juicy Bone-In Chicken Breasts In The Air Fryer
Prep the Air Fryer – Start by preheating the air fryer because it helps to get that super crispy skin plus it helps with overall even cooking.
1. Pat dry the pieces – With a paper towel, pat dry the skin and underside of the chicken to absorb any extra moisture. The dryer the chicken can be, the better the seasoning will coat the pieces.
2. Coat the chicken- Combine the spices and the cornstarch then coat the chicken pieces in the mixture. An easy way to do this is by placing all the spices in a plastic sandwich bag or lidded container, then put the chicken, one piece at a time, into the spice mixture and shake it around for even coverage.
When seasoning, you can use any of your favorite seasonings you usually like. I love the Montreal Chicken Seasoning, but you can easily whip up your own homemade chicken seasoning blend.
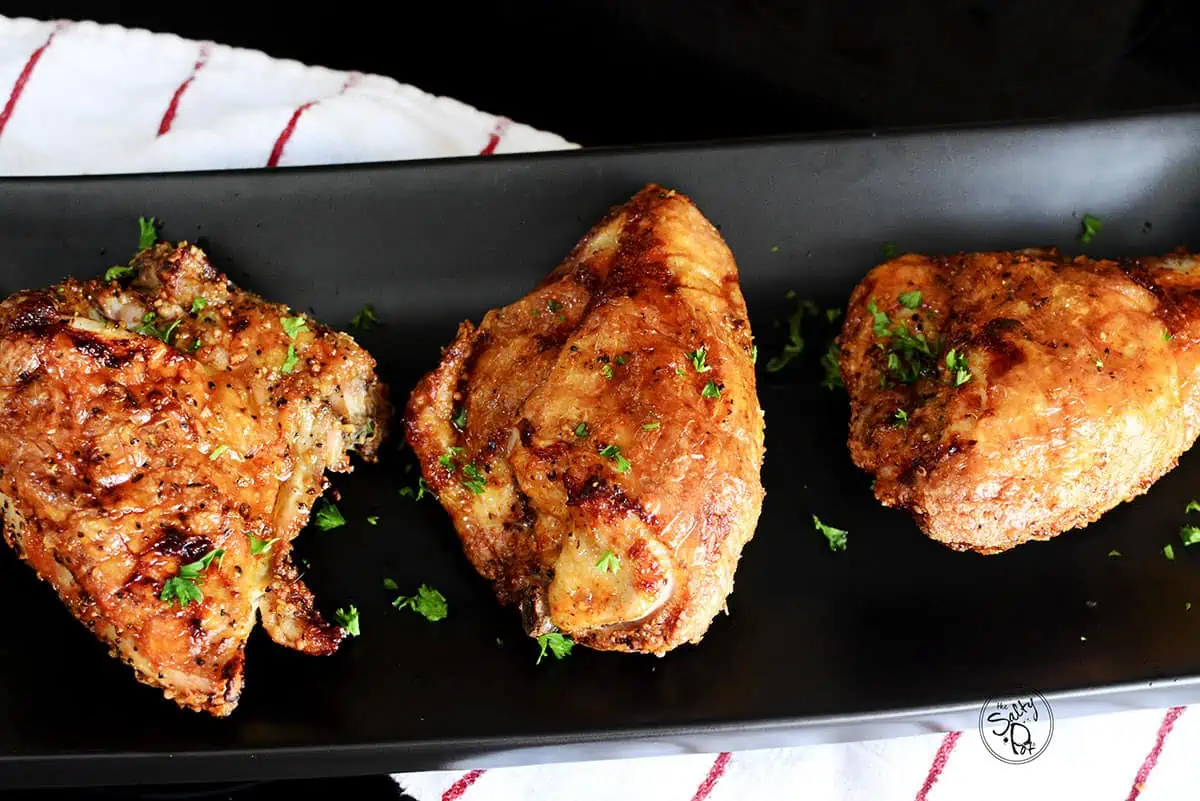
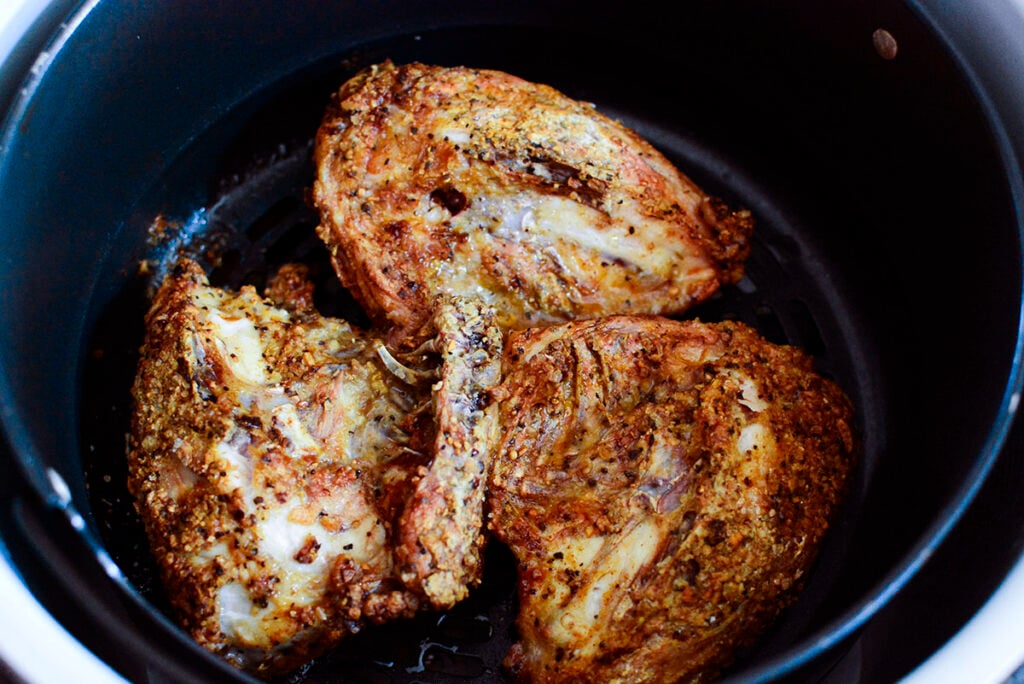
3. Air Fry the Chicken Pieces- Add the chicken to the air fryer basket, skin side down, in a single layer, and cook for 20 minutes. After the 20 minutes, flip the chicken breasts skin side up, and continue to cook for another 10 – 12 minutes until the internal temperature reads 165F.
When taking the internal temperature of the chicken, insert the thermometer at the thickest part of the chicken (and do not touch the bone). This is the digital meat thermometer I use.
4. Rest the cooked chicken – Remember to let the chicken rest before serving so all the juices can redistribute through the breast for about 5 minutes on a rack.
Salty Pot Tip: Want to add EVEN MORE juiciness? Try brining the chicken breast for a few hours before you begin the recipe. You could do a salt brine or even a pickle brine (does NOT give it a pickle flavor, just all juiciness!)
Why Should You Buy Chicken On The Bones?
Chicken breast with bones also gives you far and away more flavor because the bones help retain that savory ‘built-in broth’ per se, which helps leave your chicken juicy and flavorful plus the skin is usually left on, keeping in those juices, and adding superior flavor to the meat rather than cooking it without.
A bonus is that bone-in chicken breast is typically cheaper than boneless and skinless chicken breast at the grocery store.
Rest assured, cooking these chicken breasts in the air fryer will lend you that perfect crispy skin that is oh… so satisfying.

Storing Leftovers
If there are leftovers, they can be stored in an airtight container in the fridge for up to 4-5 days. To reheat them again, pop them in microwave for a quick method, or simply air fry them again at 350 for 5 minutes or so. You should know that while you regain a bit of that crispiness on the outside, the inside may be a bit dryer than it originally was when you air-fried it because of the extra heat added to already-cooked chicken breast.
You could freeze them for up to 3 months and the flavor would be intact, but the crispiness of the skin would no longer be there.
Serving Ideas and Variations
Serve these chicken breasts with any side that’s ready to go in about 15 – 20 minutes. You could try sides like this Carrot Salad with Sweet Orange Dressing for a bit of freshness, or if you have a double chamber air fryer, try these Air Fryer Acorn Squash that are simply divine! For a decadent and fun side dish, try this Baked Zesty Cheese Doritos Mac and Cheese
More Air Fryer Chicken Ideas
If you want a super delicious TROPICAL vibe for your chicken, Air Fryer Huli Huli Chicken recipe hits the spot. Other chicken recipes for the air fryer are my Butterflied BBQ Chicken Legs, and my BBQ Chicken Thighs are also delicious!
Did you make this Air Fryer Chicken Breasts Recipe? Be sure to leave a rating and a comment below or shoot me an email at [email protected]. Thank you for stopping by today!

Air Fryer Bone in Chicken Breast
Crispy and delicious, these juicy air fryer bone-in chicken breasts are simple to make and air fry. The seasonings make them so delicious, and the air frying method leaves them super juicy with a crispy coating, every single time.
Ingredients
- 3-4 chicken breasts, bone in, skin still attached
- 1 tablespoon Montreal Chicken Seasoning
- 1 teaspoon Smoked paprika
- 2 Tablespoons of cornstarch
Instructions
- Preheat the air fryer to 400 for 5 minutes.
- Pat dry the chicken breasts with kitchen towel.
- Combine the spices and the cornstarch together and place them into a plastic sandwich bag or a Tupperware container with a lid.
- Place the chicken breasts into the bag, one by one, and shake them to distribute the cornstarch and seasonings all over the chicken breasts.
- Add the chicken breasts to the air fryer basket, skin side down, reduce the heat to 370 and cook for 20 minutes.
- After the 20 minutes is up, open the air fryer basket and carefully flip the chicken breasts, skin side up, and continue to cook another 10 minutes for further crisping.
- Total air fry time should be about 30 minutes or until a meat thermometer reads 165F. **see notes
- Let the chicken rest before serving. Enjoy!
Notes
- You can also choose to spray the chicken very lightly with some olive oil or avocado oil to help the seasonings stick if you need to.
- For best results, air fry chicken breast in a single layer until a safe temperature is reached. You can use a digital meat thermometer to ensure that your chicken is fully cooked.
- This is important because the size of your chicken breasts will affect the cooking time. To be sure that your chicken breast is done the internal temperature should be 165 degrees F.
- Remember to let the chicken breast rest before digging in!
- Patting the chicken dry with a paper towel helps the seasonings stick to the chicken. You can use a spritz of oil if you prefer, but I find the chicken skin adds enough fat to make it crispy and the seasonings stick quite well without it.
- You might want to start checking the temperature of the chicken at the 20-minute mark. You can turn the air fryer off when the internal temperature reaches 160F and let the chicken rest inside the basket for 10 minutes. It will continue to cook from the residual heat to reach 165. Some people prefer to cook the chicken right to the proper temperature, and then let it rest, (still cook), and that's totally fine.
- The true cooking time will depend on the size of your air fryer, as well as the sizes of the chicken breasts. I could only fit 3 breasts into the basket, and I cooked the last one while we ate dinner.
Nutrition Information:
Yield: 4 Serving Size: 1 chicken breastAmount Per Serving: Calories: 218Total Fat: 4gSaturated Fat: 1gTrans Fat: 0gUnsaturated Fat: 3gCholesterol: 102mgSodium: 90mgCarbohydrates: 5gFiber: 0gSugar: 0gProtein: 37g
All nutritional information is based on third-party calculations and is only an estimate. Each recipe and nutritional value will vary depending on the brands you use, measuring methods, and portion sizes per household.


This is an amazing recipe!!! These came out absolutely perfectly. I used chicken bouillon instead of the chicken seasoning. Great crispy skin and super juicy. I’m excited to try different spice blends. Thanks for sharing!
Wow Ashley, thank you so much for the kind words!! I’m sitting here working when you posted your comment and it totally made my night. I’m SO happy that you enjoyed the recipe!!
***** from me!!! I just made this and am eating it as I write. It is simply crisp on the outside, moist and delicious on the inside. I bet if I left it in the marinade for 1 to 2 hours it would be that much more delicious! Thank you.
I’m so glad you liked the recipe Barbara, and thank you for commenting! (and the 5 stars – it really helps the site!)
The parchment paper is brilliant!! It just saved me a LOAD of scrubbing.
Absolutely GOOB SMACKED. Trying your recipe tonight.
Fantastic!! I’m so happy that it worked out for you!!! 🙂
I have made this recipe twice now and both times turned out perfect! My chicken breasts were large and I cooked two of them for 20 minutes skin side down and then turned down the heat to 370 turned the breasts over….Delicious and juicy.
I just made these. I cooked them for 20 mins, the thermometer showed about 150 degrees, so I put them in for another 5 mins but that overcooked them. I always struggle with getting it just right, however the fam did like them. So I would do this again.
I’m sorry you had a little bit of trouble with the recipe. Maybe it was the size of the breasts that you started with? It’s nice to hear that you’ll try it again though! Thank you for commenting Leslie!