Easy No Knead Dutch Oven Bread
This No-Knead Dutch Oven Bread is SO easy to make, it almost mixes and bakes itself into sheer gorgeousness. Plus, freshly baked bread with homemade fresh butter is divine!
It easily rivals any bakery-bought, artisanal bread. And once you get this easy-to-make recipe under your belt, the exploration of adding different ingredients to make it your own is endless.
NO KNEAD DUTCH OVEN BREAD
The days of using your whole day to make bread, punching the dough, with hours for rising, watching, and tending the dough are over.
This no-knead dutch oven bread has to be the easiest homemade bread recipe ever. It’s very little hands-on working time and the end result will easily rival any bakery bread.
And what I love most about this recipe, besides the simplicity of making it is the fact that when you get used to making this recipe, you can start adding things to really make the recipe unique to you. It can be a brand-new recipe every time you make it!
It’s so easy to make this bread yet people will think you’ve worked incredibly hard to make it. Let them think you were kneading your knuckles raw. In fact, wear band-aids when serving for added admiration, ha!
Needed Ingredients for this Easy Bread Recipe
It’s so crazy simple, you won’t believe it. You will need:
- Flour – all-purpose flour is what I use.
- Yeast – You’ll want to use dry yeast, the freshest the better. Take note of the expiration date on the package to ensure you’re using the freshest available.
- Water – Lukewarm water. Using hot water will kill the yeast or too cold water will impede the rising action and make it take longer to rise.
- Salt
Nothing fancy here, just good old basic bread ingredients. I used non-bleached, all-purpose flour for this recipe and your standard packet of quick-rising yeast.
How do you make this awesome No Knead Bread??
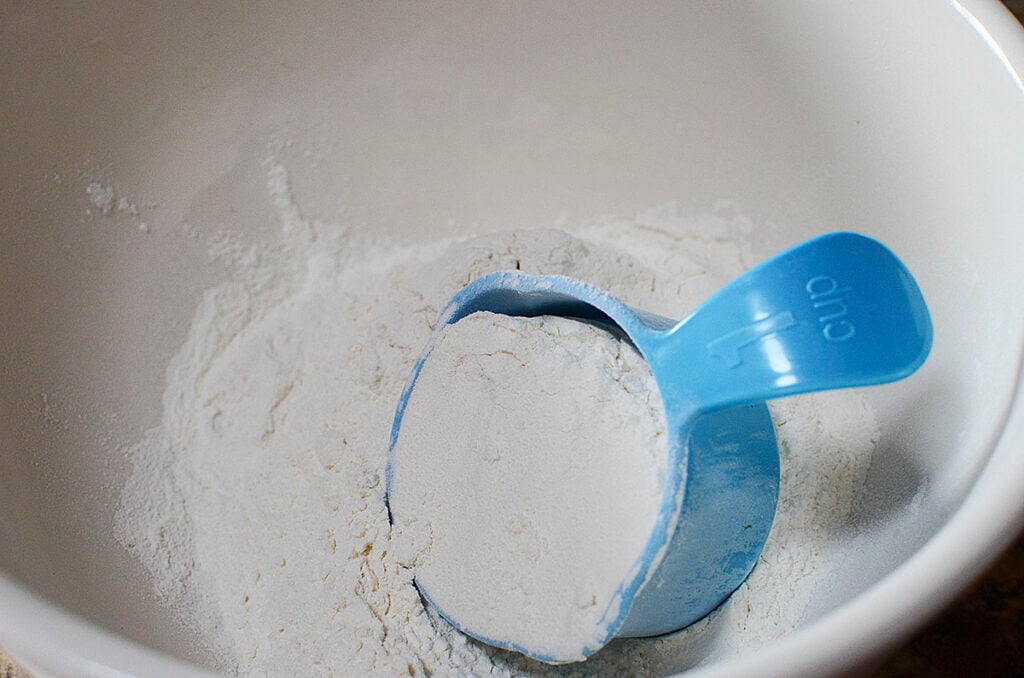
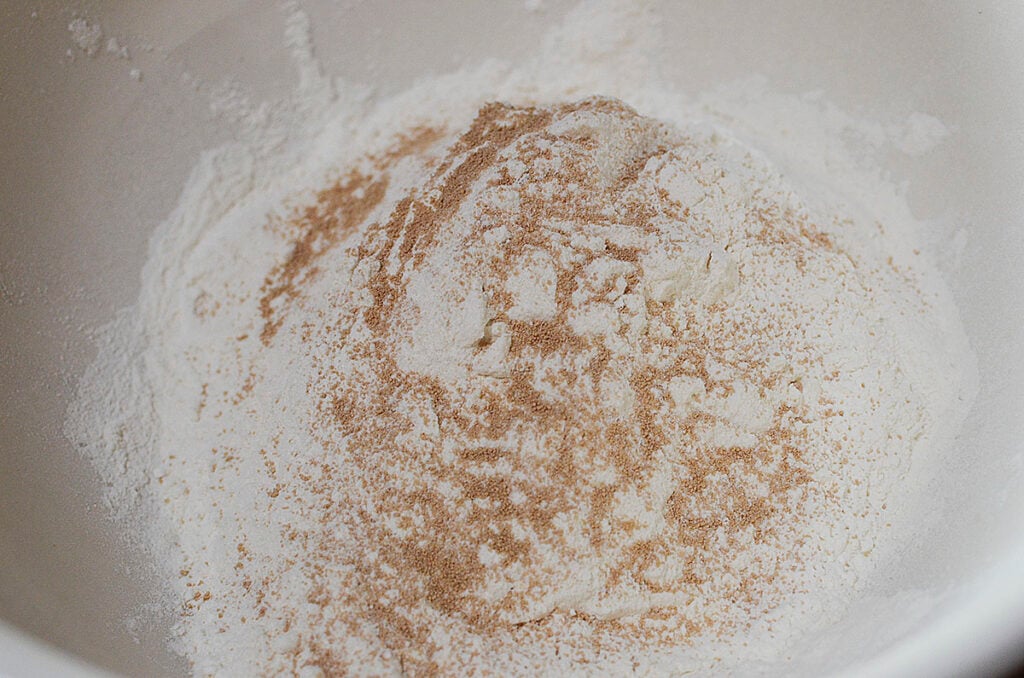
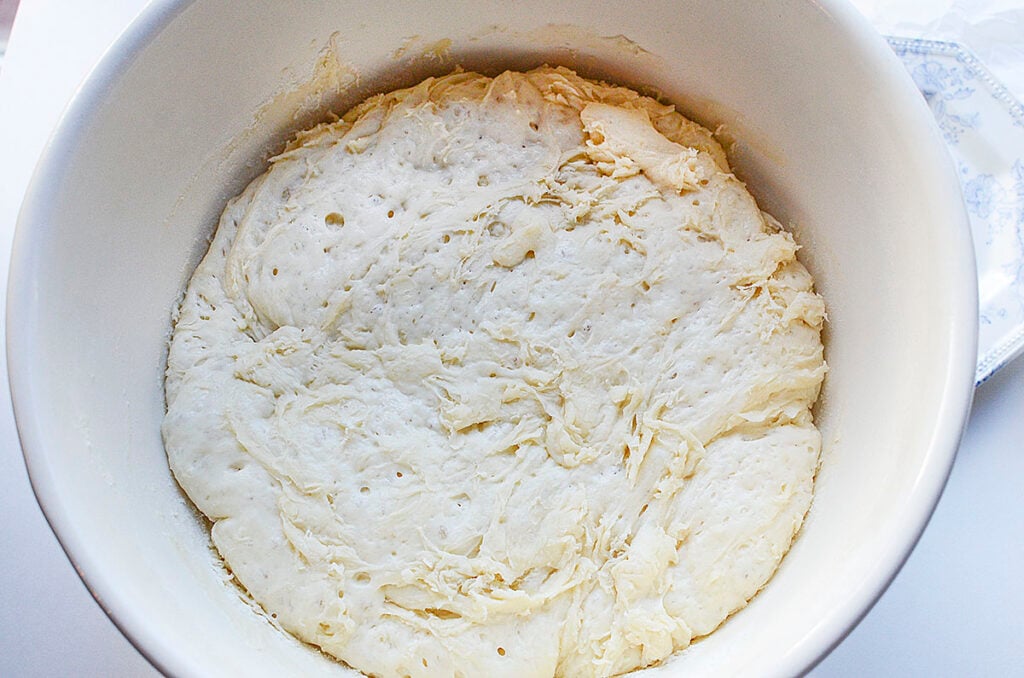
So let’s get on with it. Put the flour, yeast, and salt in a bowl. Mix it up well.
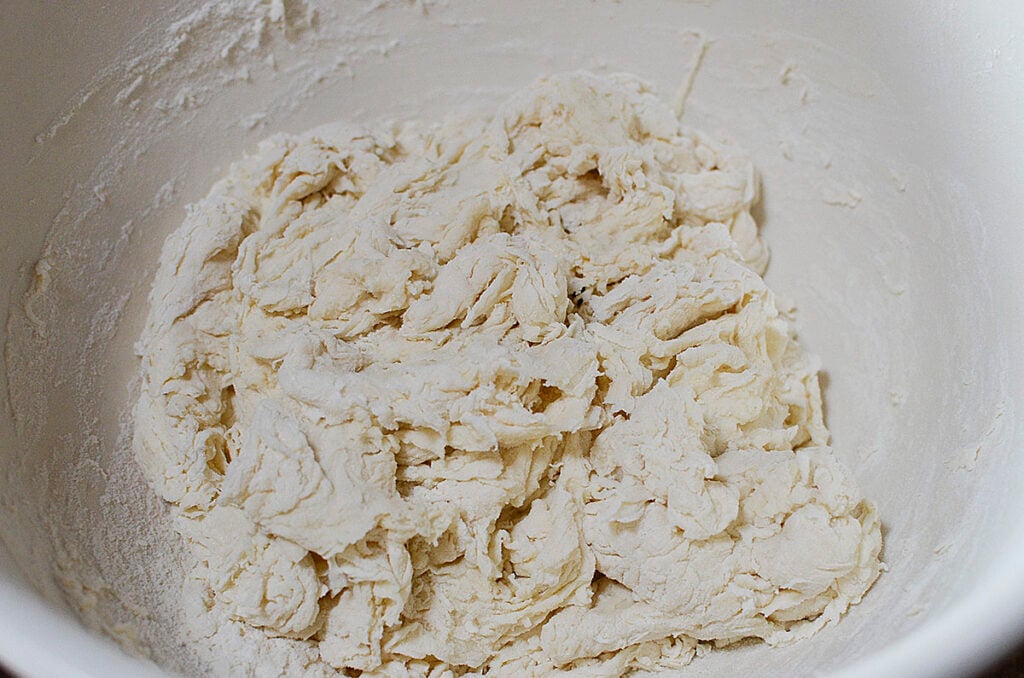
Add the warm water. Mix again.
Cover it with plastic wrap and put it somewhere cozy like the top of your stove, above the fridge, in the tub with you.
Ok, forget the tub thing, but you get the idea. Tuck it in for four hours and leave it. Go paint your nails. Go paint your deck. Make the margaritas (and invite me over).
Then, four hours later, throw some flour on your counter and dump out the dough. Use a scraper or super floured hands and throw it around a bit. Fold it in on itself once or twice. Flip it over. Take the outer sides and pinch it into the middle like a dumpling.
Poke it. Whisper sweet things to it. Tell it how much you love it…. haha, that might be too much, but really, the point is to just squish it down a bit and get it floured on both sides.
Grab a piece of parchment paper and lay the dough on it, and cover it with a nice clean towel for 30 min.


While it’s resting, preheat your oven to 425. If you have a Dutch oven to bake it in, use that. If you have a cast iron pot with a lid, use that. Simply saying, use anything that can roast something at a high heat WITH A LID.
Put it in the oven with the lid (make sure the knob is NOT plastic) and let it preheat with the oven.
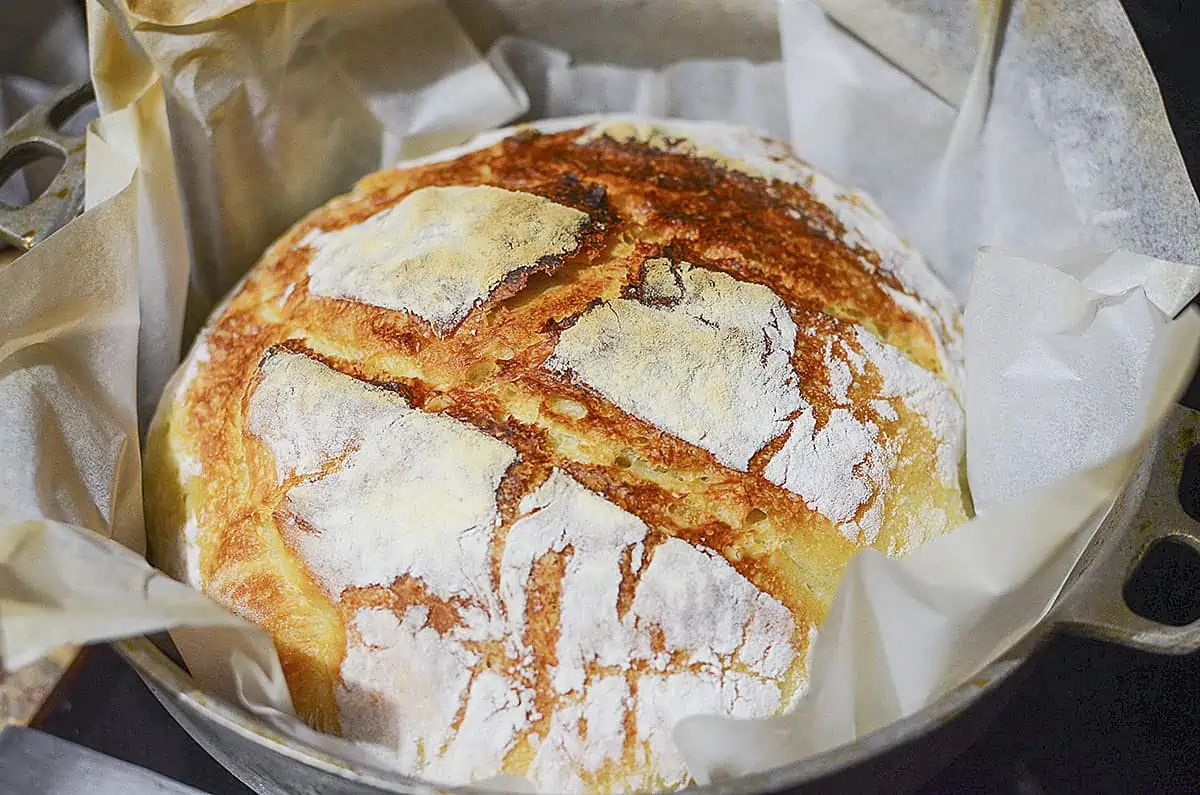
After 30 minutes and the oven is at temp, remove the cover on the dough, take a sharp knife, and cut 2 -3 slashes in the top. Then, take the lid off the pot, grab the dough by the corners of the parchment paper and drop it in the pot.
Tuck the edges of the paper into the pot and put the lid on. Set the timer for 30 minutes. The parchment will not burn (as long as you don’t confuse the situation and use wax paper. No wax paper please.).
See, NO KNEADING!!!!!
After 30 minutes, take the lid off and add two ice cubes to the sides of the bread in the Dutch oven. The ice will melt and then the water creates steam which helps form the crust on the top. Don’t worry it’s just water, and it totally evaporates.
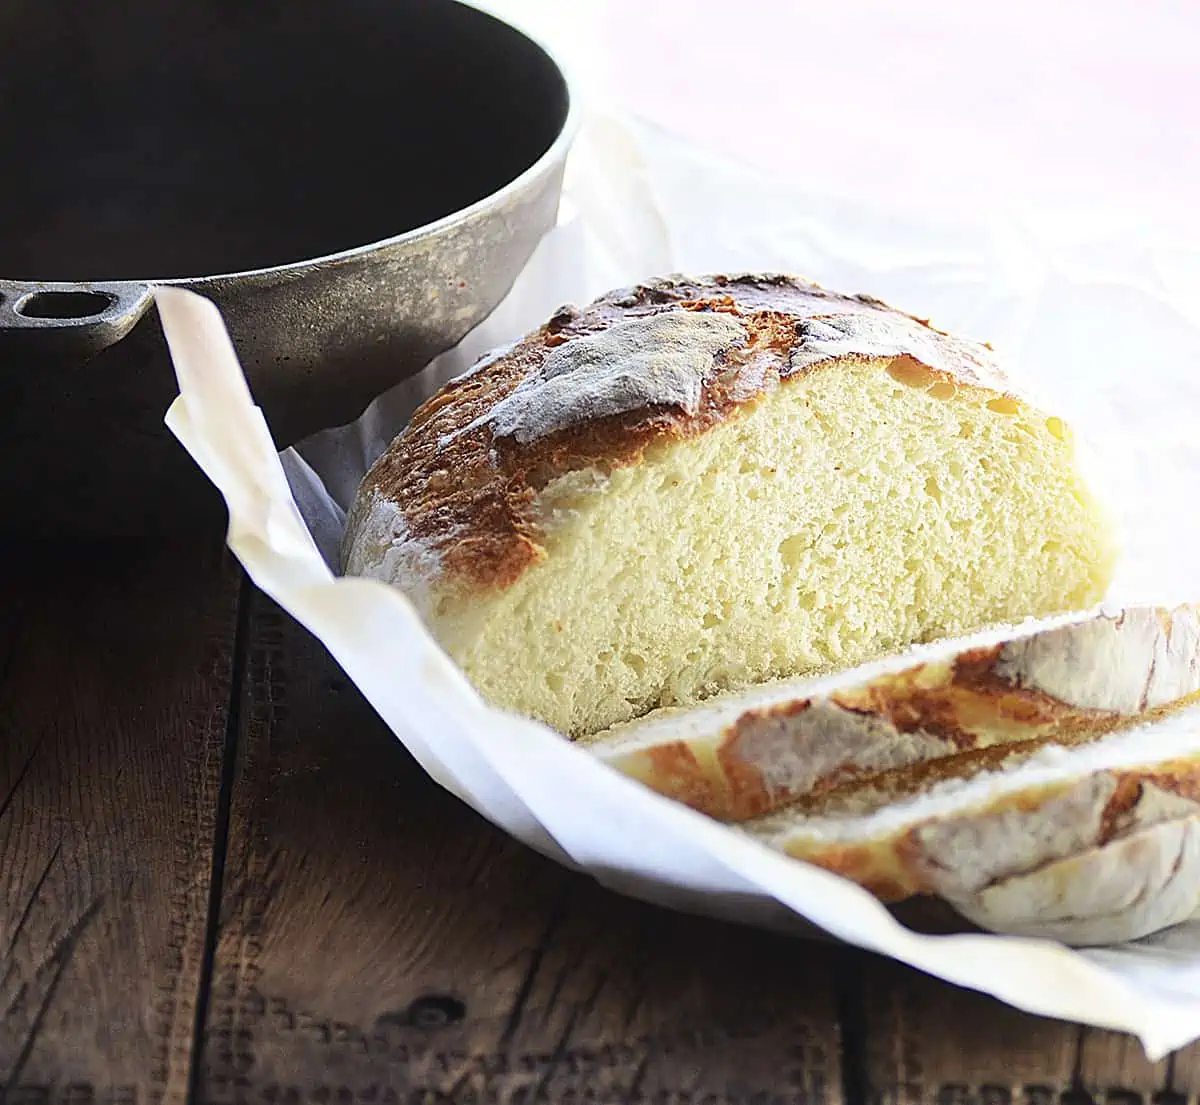
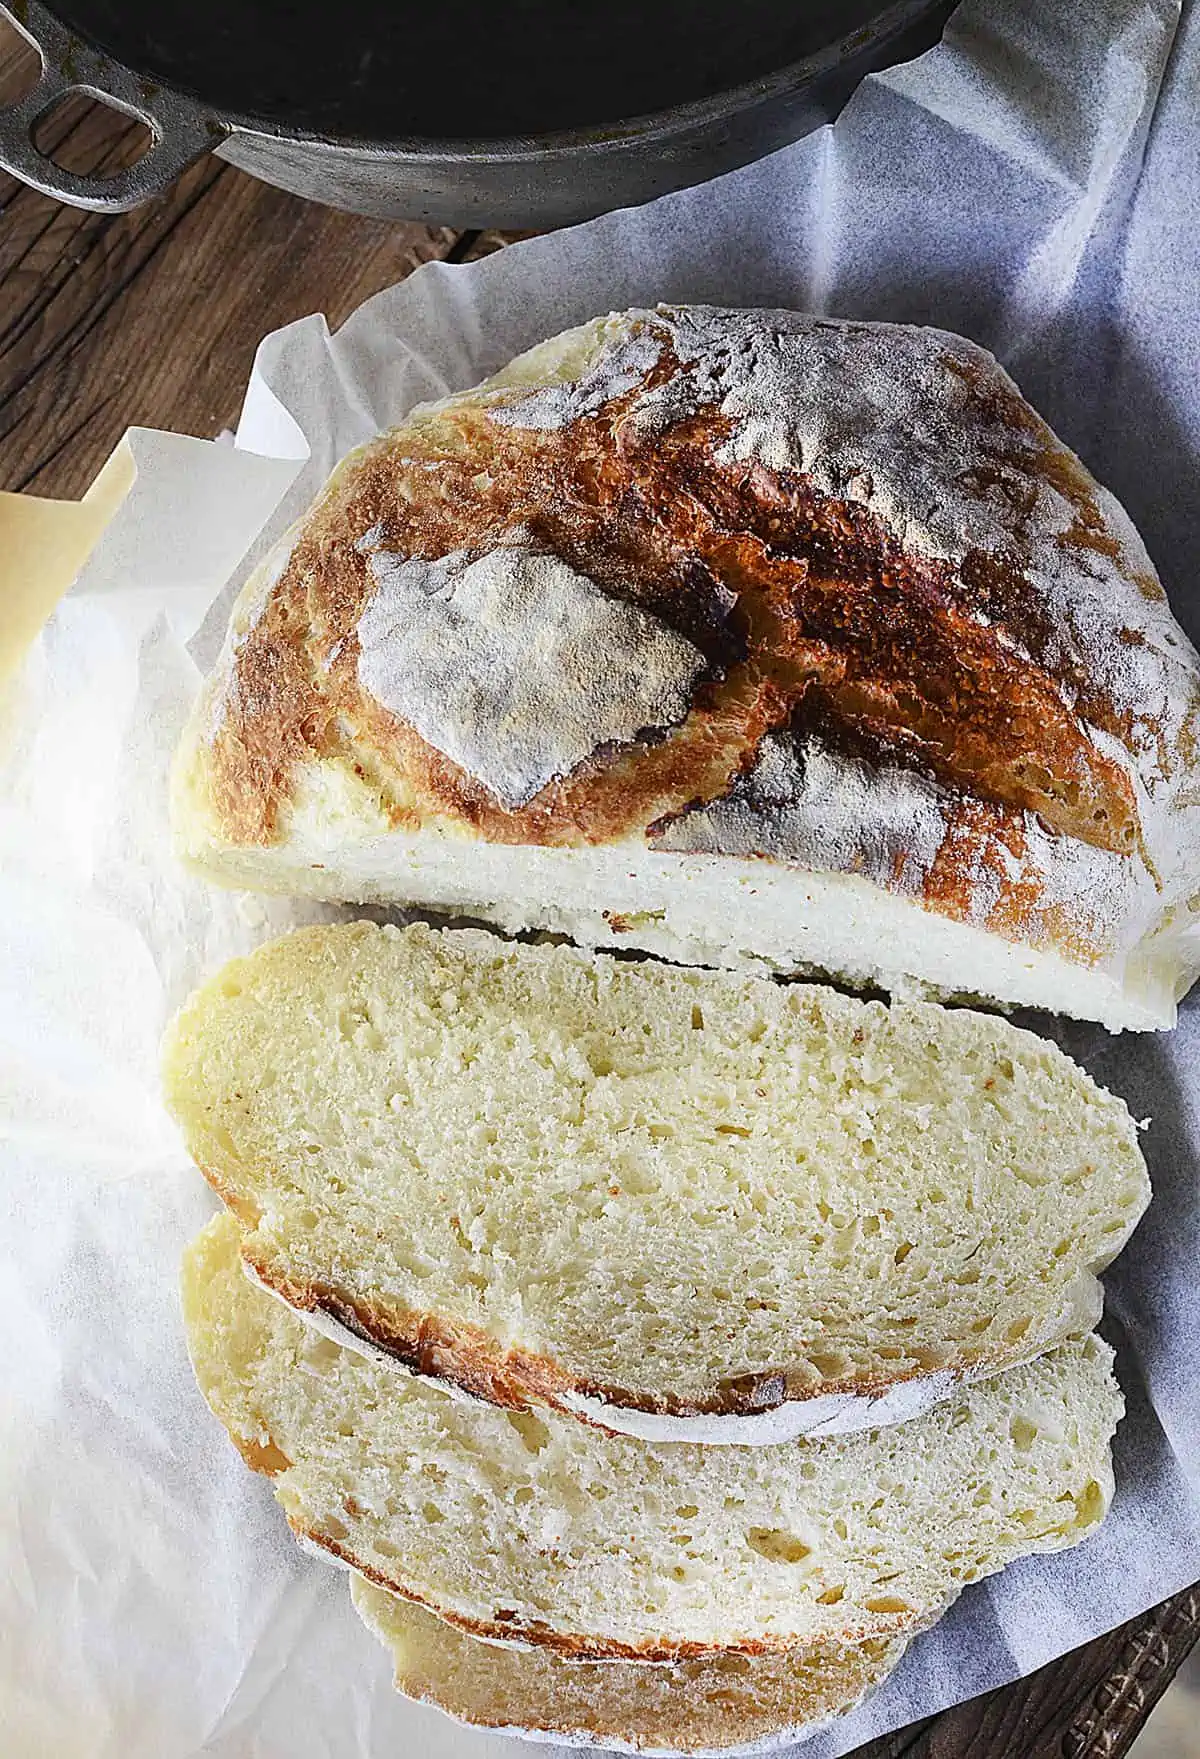
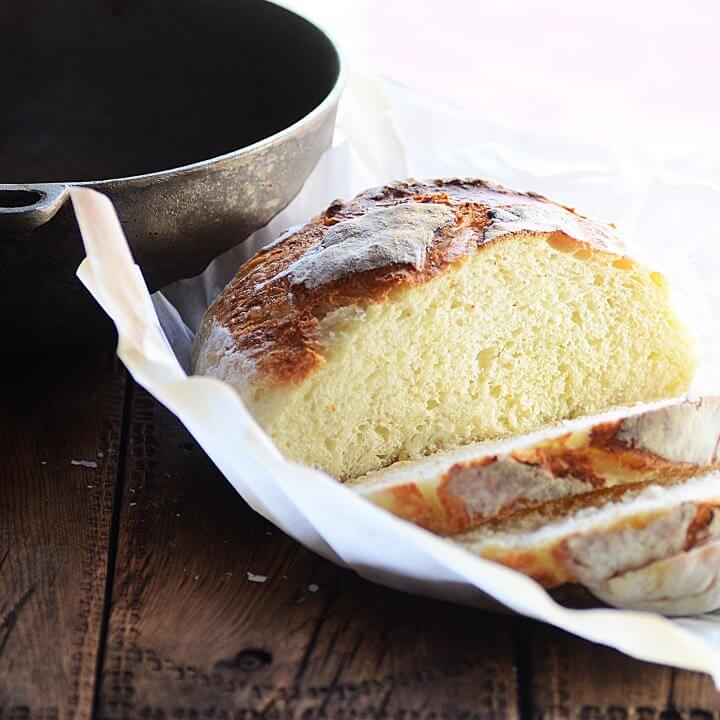
Leave in the oven for another 15 – 20 minutes or until the crust is nice and brown. Take it out and let it cool.
That’s it!! After it’s cool, you lift it right out of the pan by the parchment and transfer it to a cutting board.
TRY YOUR HARDEST to wait until it’s completely cooled. The bread will thank you for it. Trust me. (Cutting hot bread = squished flat loaf).
How to Serve this Easy Homemade Bread
Slather it with butter. The combination of freshly baked bread with homemade butter? It’s a culinary masterpiece, for real. There’s NOTHING like it!
There’s a whole plethora of toppings you can put on the bread that can make it an entire meal in itself. Also, turning this bread into homemade garlic bread is super simple!
Make a delicious bowl of homemade tomato basil soup and use the sliced bread to make a grilled ham and cheese sandwich!
You won’t be sorry if you try making this no-knead bread. The experience and gratification of making your own bread is amazing and well … the taste is something out of this world!!
TIPS AND TRICKS FOR THIS DUTCH OVEN BREAD:
- Use a flour that is strong. Cake flour doesn’t have a strong (or enough) gluten in it to form a nice crumb for the bread.
- You can mix your bread flours, all-purpose with a bit of whole wheat or even rye, but use a ratio of 1:4. The harder flours will make the bread denser and you don’t want to bake a brick.
- Make sure to create the slashes on top of the bread before you bake it. It helps to form more surface area for the crispy crust, and it just looks really cool and professional. 😉
- PLEASE wait until the bread has almost completely cooled to cut it. If you don’t it will seriously crush or smoosh the bread down and no one likes smooshed bread.
OK, so that’s about it! I hope you give this Dutch Oven Bread recipe a go! It’s really so easy, and I hope you enjoy the final product! If you do, please take a photo and email me or hashtag TheSaltyPot on Instagram. I’d LOVE to see your final product!! Thanks so much for stopping by The Salty Pot today!
No Knead Dutch Oven Bread
This no-knead Dutch Oven Bread is one of the easiest and tastiest loaves of bread I've ever made. The crispy top, the soft inside, and that flavor is deliciously homemade.
Ingredients
- 3 C flour
- 1/2 tsp yeast
- 1 tsp salt
- 1 1/2 C warm water
Instructions
- In a big bowl, combine flour, yeast salt, and warm water. Mix well.
- Cover with plastic wrap and leave for 4 hours
- After 4 hours, transfer to well well-floured counter top.
- Bring the sides of the dough into the center. Pinch them together.
- Flip over and give it a squish.
- Place dough onto a piece of parchment paper
- Cover with a clean light towel for 30 minutes.
- Meanwhile, preheat the oven to 425, and preheat the baking pot in the oven at the same time.
- When the oven reaches temperature, lift the cloth off the dough and make 2 - 3 shallow cuts in the top of the dough.
- Take the lid off the pot in the oven, and place the dough in the baking pot, parchment paper and all.
- Replace the lid. Bake for 30 minutes.
- After 30 minutes, remove the lid and add two ice cubes to the sides of the bread in the Dutch oven. Bake for another 15 - 20 minutes or until the bread is golden brown.
- Remove from oven, let cool slightly, and remove the bread by grabbing the parchment paper out of the pot. Let cool completely.
Notes
- Use a flour that is strong. Cake flour doesn't have a strong (or enough) gluten in it to form a nice crumb for the bread.
- Make sure to make the slash on top of the bread before you bake it. It helps to form more surface area for the crispy crust, and it just looks really cool and professional. 😉
- PLEASE wait until the bread has almost completely cooled to cut it. If you don't it will seriously crush or smoosh the bread down and no one likes smooshed bread.
Nutrition Information:
Yield: 12 Serving Size: 1Amount Per Serving: Calories: 114Total Fat: 0gSaturated Fat: 0gTrans Fat: 0gUnsaturated Fat: 0gCholesterol: 0mgSodium: 196mgCarbohydrates: 24gFiber: 1gSugar: 0gProtein: 3g
All nutritional information is based on third-party calculations and is only an estimate. Each recipe and nutritional value will vary depending on the brands you use, measuring methods, and portion sizes per household.


Hi I just read this recipe and was wondering if cutting the salt in half would it come out alright. My husband has kidney disease stage 5 so I have to be really careful with sodium.
Hi Mary! I’m sorry to hear about your husband 🙁 But feel free to half the salt – it’s only there for flavor. I hope that helps and thank you for commenting 🙂
I hope this isn’t a complete flop. The dough is so sticky and runny. It would not form a ball.
Hey Jessica! Wow, I’m interested to see how this turned out for you because in all the years I’ve been making this bread, I’ve never had a problem like you described. How did it turn out for you in the end? If you’d like, please shoot me an email to [email protected], and I can try and help you troubleshoot what might have gone wonky.
Is it okay if the bread sits for more than 4 hours? Like maybe overnight?
Hi Keely! Absolutely, and it might develop an even better flavor!
For those people worried about splashing 1/2 cup of water into the oven (and you shouldnt worry BTW) use a spray bottle with water in instead. Works just as well.
Great recipe BTW.
John
Hey John! Thank you for your comment. I know it’s funny how some people worry about the half a cup of water. I’ve had more things spill/overflow in my oven that were more than 1/2 a cup! LOL! I’ve never had an issue whatsoever with the water, but your idea of the spray bottle is fantastic!
I LOVE this recipe!! I love to cook but hate to bake and bread has always been scary to me. This recipe is SO easy that I make it every weekend. I love it fresh out of the oven with butter, but the next day I’ll grill it and serve it with homemade bruschetta and THAT my friend is the cats meow!! Thank you for this awesome recipe!!
Hey Molly!! I’m incredibly happy that you loved this recipe! I know, it’s one of the EASIEST ways to ever make fresh, yummy, delicious bread! I LOVE your idea of grilling it and the bruschetta idea!!! I’ll have to try that sometime! Thank you so much for taking your time to comment 🙂
I was wondering about doubling the recipe. I have a large Dutch oven and didn’t want it to flatten out too much. Any suggestions
If you’re asking me about doubling the recipe, I have never done it, but I don’t see why it wouldn’t work. I’ve also used that recipe and baked it on a sheet pan, and it turned out quite fine. It doesn’t really expand in circumference as much as it does in height.
Thank you for posting this. I have made bread for over 30 years off and on, but have made less in recent years due to painful knuckles so rely on a bread hook to knead my dough.
I really did not think this recipe would work as we are told it’s the kneading that develops the gluten and that’s what makes the bread rise.
However I’m always ready to try anything once!
It does make a very wet dough, but rises beautifully (I added a little sugar to aid rise). I cut my dough in half and baked one as you suggested and one I put to rise in a bread tin. I baked both together in the oven and found no discernable differnce in outcome (ie one baked with a lid on and one without). My husband got really excited about this bread, it’s probably the first time he’s been at home when I’ve baked – newly retired! He was a little concerned about throwing water into an electric oven!!!
I’ve since started adding ingredients to the basic recipe, Yesterday I made a walnut bread and it was delicious. Soon I shall have a new career as an artisan bread maker!
That’s so wonderful to hear Jane! I’m always up for anything that makes life easier, so it’s so awesome that this recipe has done that for you – and it’s amazing how artisan quality the bread comes out! I’m very interested in hearing about the walnut bread – can you email me more information? Again, just thrilled you (and your husband!)liked the recipe 🙂
I thought the half cup of water would go inside the Dutch oven with the bread dough? Not directly in the baking oven! Just asking to clarify!
Hi Karen! Yes, the water goes directly into the baking oven! It will create a steam that helps form the really beautiful brown crust on the top of the bread!