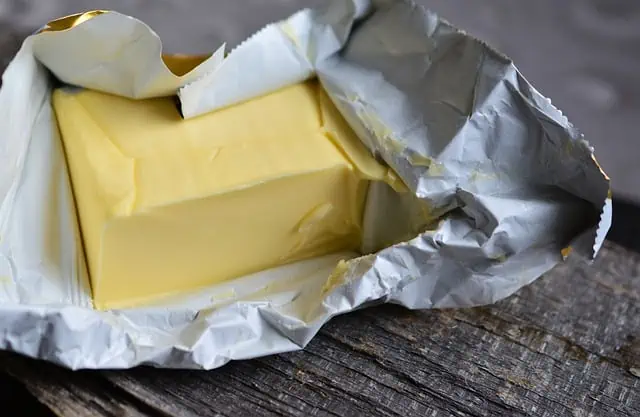
How To Make Butter At Home (1 Ingredient, No Fail)
Making homemade butter is incredibly easy and once you’ve tasted its rich, fresh flavor, you’ll never go back to buying it. Learning how to make butter is not only a valuable culinary skill that will serve you for a lifetime but making butter homemade is also cost-effective if you do it correctly.
Today I’ll explain 3 different ways to make your own butter, how to store it, how to use it, and different ways to flavor it! (Two of my favorite ways are to make Whipped Brown Butter or Whipped Hot Honey Butter!!)
Honestly, there’s something super satisfying about watching the cream transform into delicious golden butter.
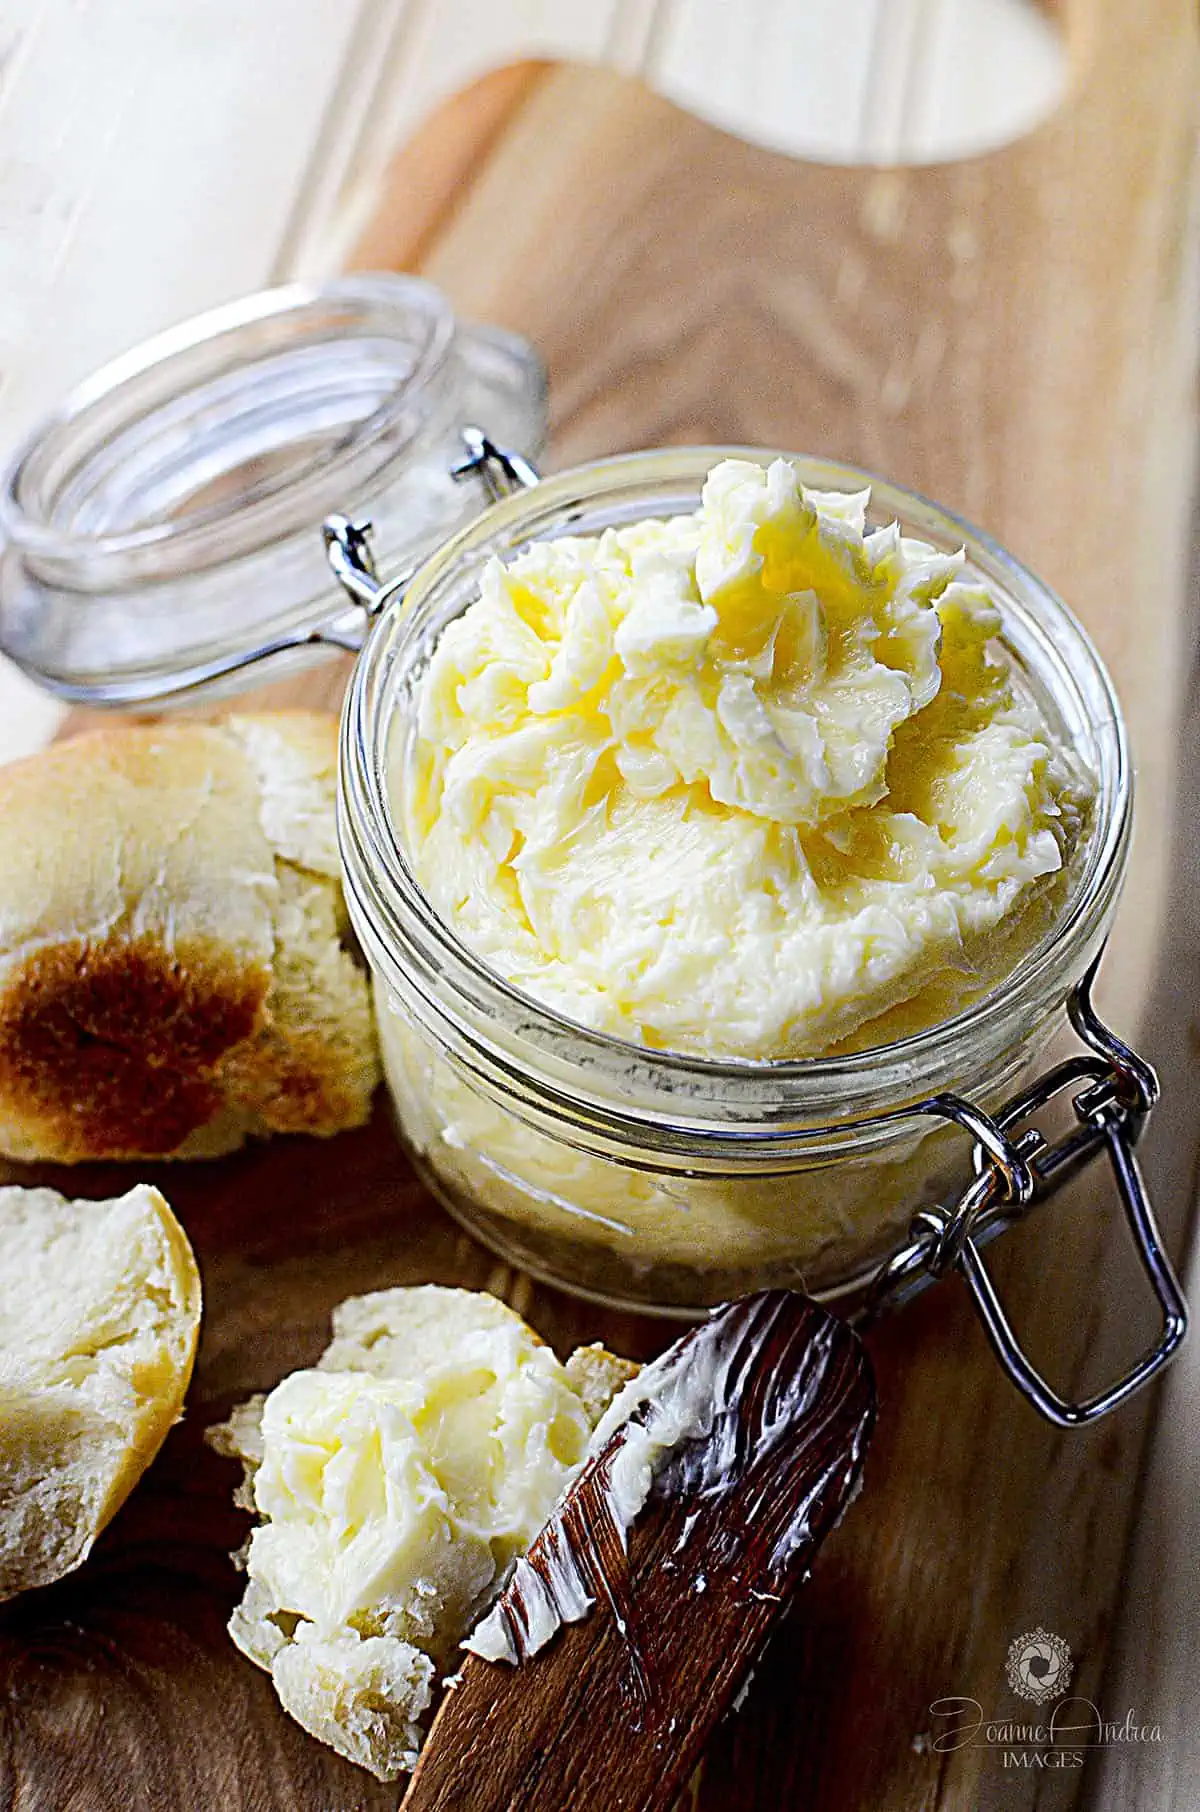
Making butter at home is so easy!
What Is Butter Made Of?
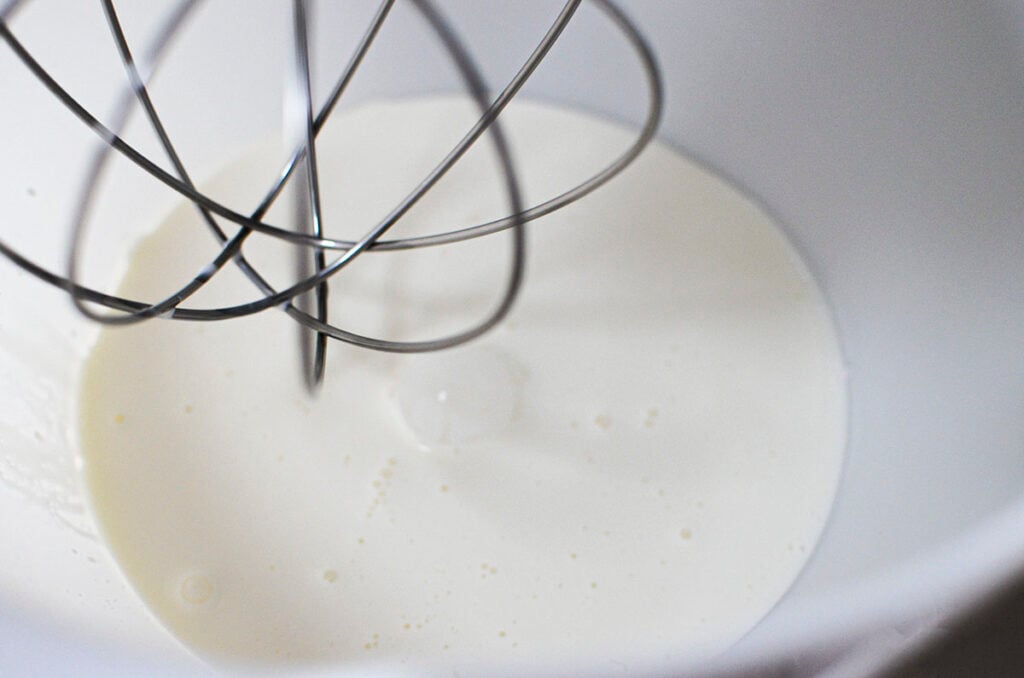
Butter comes from cream. Cows produce cream, cream becomes butter. (with a little elbow grease). When we whip our heavenly whipping cream, sweetened with sugar, and it forms into little pillowy clouds of everything good in this world, we obviously stop whipping it at that stage.
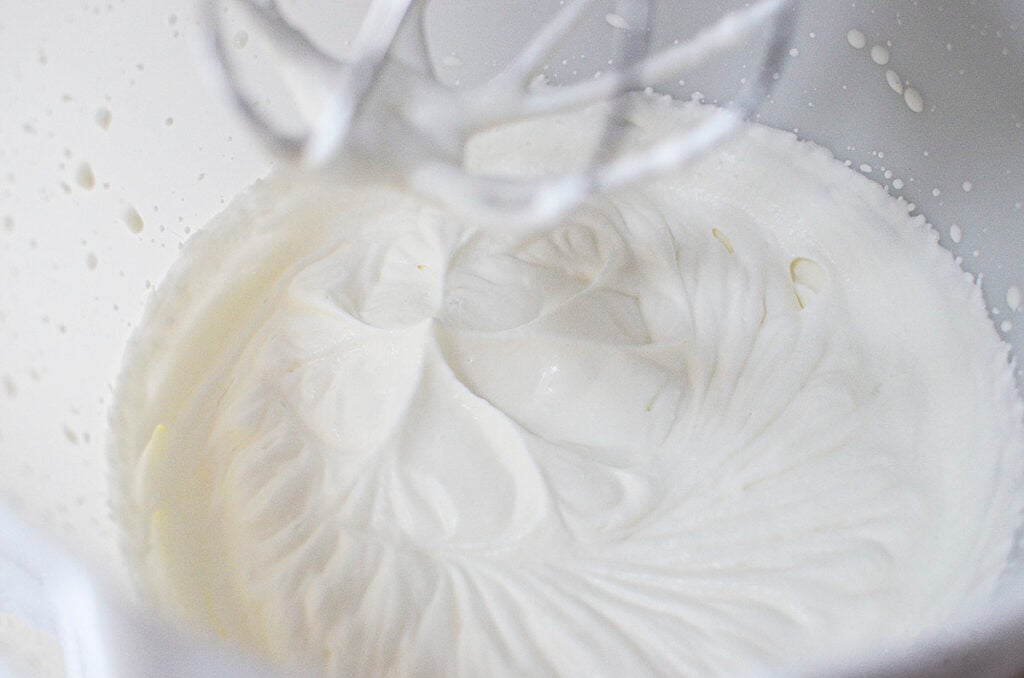
But did you know if you kept whipping it, (let’s say, by accident) it would eventually start to form into butter?
It’s the whole magic of chemistry and maybe a bit of physics thrown in there. When the cream is whipped past its point of billowy clouds, it’s like the heavens open up, and butter starts to emerge in its loving splendor.

Ingredients Needed For This Butter Recipe
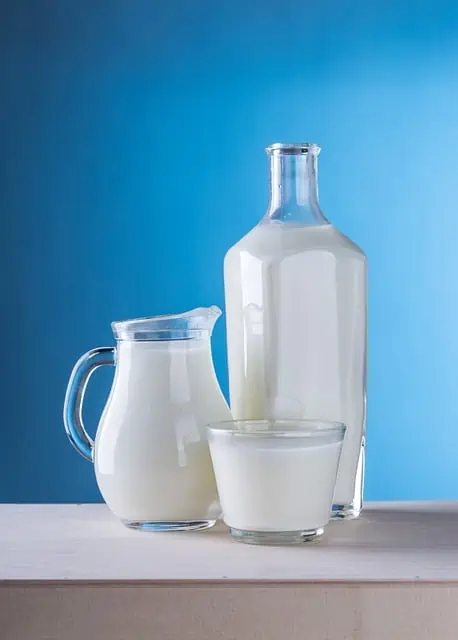
- COLD Heavy cream: Preferably, try and find organic cream and be sure it’s not ultra-pasteurized. However, if you find heavy cream on a good sale, that’s the time to stock up! You can also use whipping cream, or heavy whipping cream. Heavy cream has the highest percentage of butter fat in it, so you will end up with more butter.
- Salt – You can use regular table salt but using a flavored salt can also be delicious (see options below).
Equipment Required
- Depending on the method you want to use, you’ll need a Mason jar, a Stand Mixer, or a Hand Mixer. Please do not use a blender or an immersion blender as you’ll be making butter all day at that rate.
- Bowl and sieve (for washing the butter)
- Cold water (for washing the butter)
How to Make Butter in a Jar
Making butter in a mason jar couldn’t be easier. This is the slowest, yet easiest method (and with less cleanup) on how to make butter by hand.
Pour the cold cream into a mason jar, leaving about a third of the space empty. Seal the lid tight and shake vigorously. Watch an episode of your favorite show while you do it. In about 15-30 minutes, the cream will separate into butter and buttermilk. This method is also best for making small batches of butter at once time.
My grandma would give us the jar full of cold cream and let us shake it and shake it. Just before we were about to give up, the butter would start to form (you hear a ‘flopping’ sound from inside the jar) which would give us new motivation to keep going! Once the butter begins to form, the whole process goes very fast after that.
After the butter forms, follow the steps below to “wash” the butter.
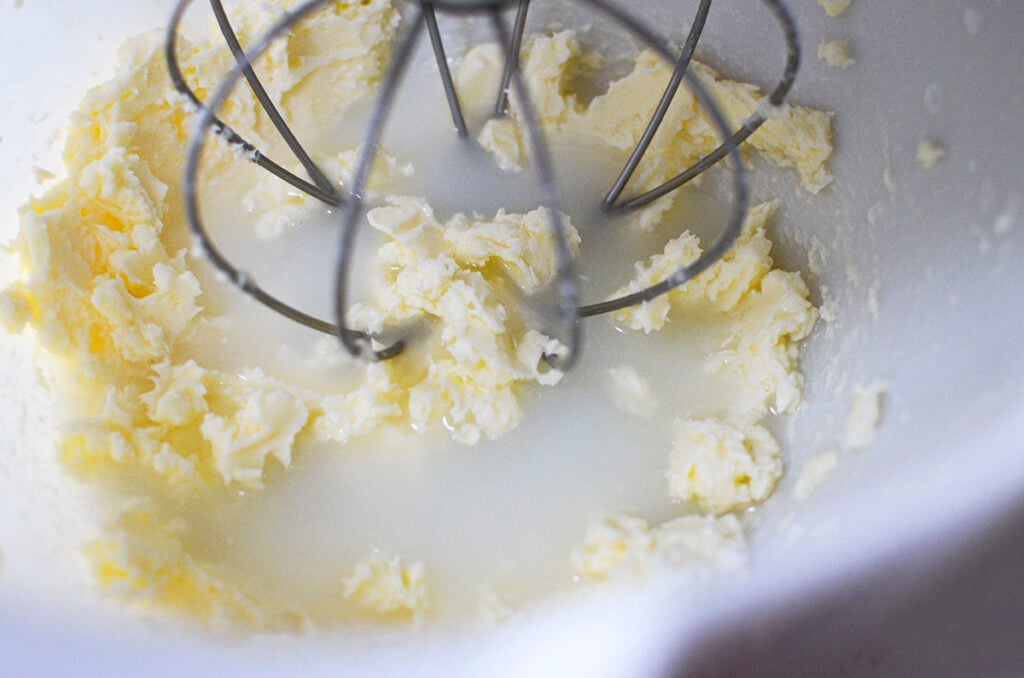
How to Make Butter using a Hand mixer
In a large bowl, pour in the cold cream. Using your hand mixer, start whipping the cream. Continue until the cream separates into butter and buttermilk. This method works, but be sure to use a very deep bowl because once the butter forms in the liquid, sloshing around will occur and can make a small mess. The deep walls of the bowl will help contain it.
After the butter forms, follow the steps below to “wash” the butter.
How to Make Butter in a KitchenAid Mixer
Pour the cream into the bowl of your KitchenAid mixer. Use the paddle attachment and start on a low setting, gradually increasing the speed. In about 10 minutes, you’ll see the cream separate into butter and buttermilk.
If using this method, I recommend using a clean tea towel to cover the mixer (or use a mixing bowl shield) so that once the butter forms, it doesn’t slosh the liquids all around. Be mindful to watch that the tea towel doesn’t fall into the mix while mixing away! (Don’t ask me how I know about this.)
After the butter forms, follow the steps below to “wash” the butter.
I have made butter using all three ways and I have to say my favorite method is using the stand mixer. It’s a hands-off approach for a while, and a stand mixer makes the process go faster.
Washing the Butter: A Must-Do Step
I know it sounds crazy – Washing the butter after you make it? Yes. Removing the traces of buttermilk from the butter will help it stay fresher, longer.
- Once you’ve separated the butter from the buttermilk, pour off the buttermilk into another bowl or glass to keep for later if you want or discard. There will still be buttermilk remaining in the butter that’s crucial to wash out of the butter so you can ensure it doesn’t become watery or go rancid too quickly.
- First, take a spatula and squeeze the butter up against the side of the bowl to ‘press’ any extra buttermilk out of the butter.
- Drain off any excess buttermilk. Then, place the drained butter in a bowl and pour cold water over it. Using your hands or the spatula, gently knead the butter, allowing any remaining buttermilk to mix with the water.
- Drain the cloudy water and repeat until the water remains clear.

Can’t I Just Use Whole Milk To Make Butter?
Unfortunately no. Unless you use raw milk that hasn’t had the butterfat (cream) separated from it yet, regular storebought milk will not work. However, you can use regular whole milk to make homemade cottage cheese!
How Much Butter Will I Get From One Quart Of Cream?
On average, one quart of cream yields around 1 pound of fresh butter, depending on the fat content of the cream.
This is why I say if you find whipping cream (or heavy cream) on sale, you should stock up and freeze it. You can make butter from previously frozen whipping cream.
Is It Cheaper To Make Your Own Butter?
The reason I like making homemade butter is that it’s often a lot cheaper if you make it yourself. However, with the prices of groceries skyrocketing (including the price of cream), there is a secret to making butter cost-effective.
The secret? Buying the cream when it’s on sale! Even if the best-before date is the actual day you make it, the whipping cream will whip right up into your own homemade butter and be miles cheaper than what you can buy at the store.
How Long Will DIY Butter Last In The Fridge?
Properly stored and washed, I’ve had homemade butter last up to a month in the refrigerator.

Can I freeze my homemade butter?
Absolutely! Butter freezes wonderfully. Store it in an airtight container or wrap it tightly, and it can last in the freezer for up to a year. My grandmother would wrap the butter in plastic wrap, then in aluminum foil, and place them in a freezer-friendly ziplock-type bag.
How Do You Make Buttermilk And What Can I Do With It?
The liquid remaining after the cream has separated into butter is buttermilk! I know it looks very different than what you buy in the store, but this is true buttermilk. Commercially prepared buttermilk has thickeners added to change the consistency of it.
The flavor is very mild compared to the super tangy liquid in the store, and it’s perfect for pancakes, biscuits, or even as a base for creamy salad dressings.
I’ve even heard you can water your plants with it, but I’ve never tried it, so do so at your own risk.
Transforming Your Homemade Butter
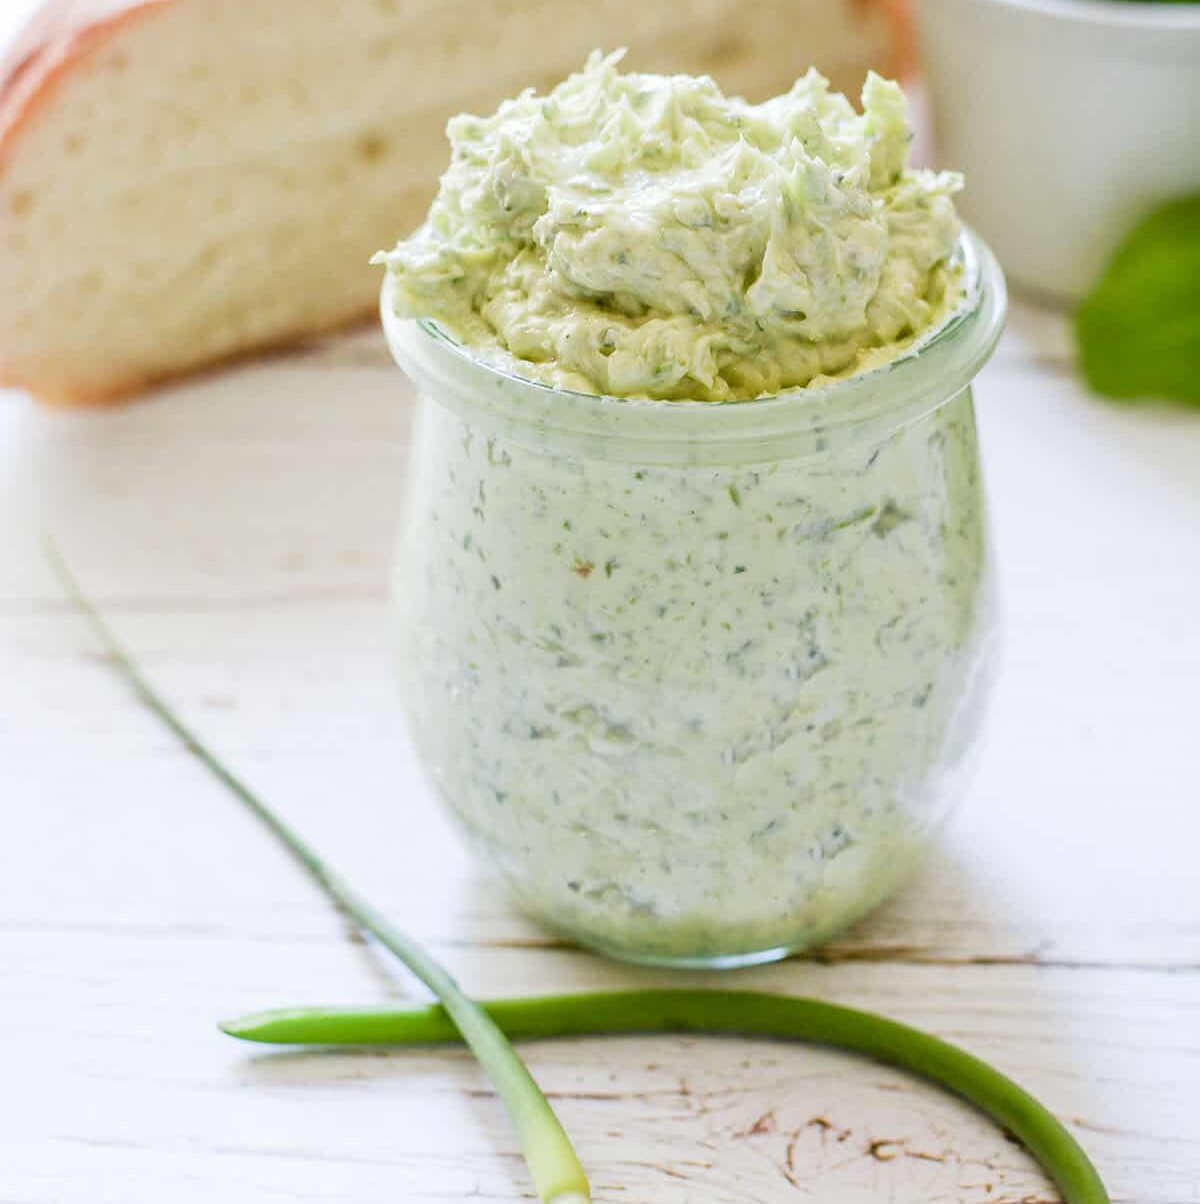
Compound Butters: Elevate Your Culinary Game
Compound butter is simply a fancy term meaning butter that is mixed with other ingredients to add more flavor. The list is practically endless and you can go sweet or savory. Think garlic-herb butter or cinnamon-honey butter. They can be slathered on toast, melted over steak, or used to finish off a dish.
Sweet compound butter ideas:
- Cinnamon
- Brown Sugar
- Honey
- Orange or other citrus
- Molasses
- Dried fruit like cranberries
- Nuts
Savory compound butter ideas:
- Garlic
- Dried herbs like rosemary, thyme, sage, etc. (think turkey basting butter!)
- Bacon
- Sundried Tomatoes
- Olives
- Anchovies
Below is my Garlic Scape Compound Butter Recipe.
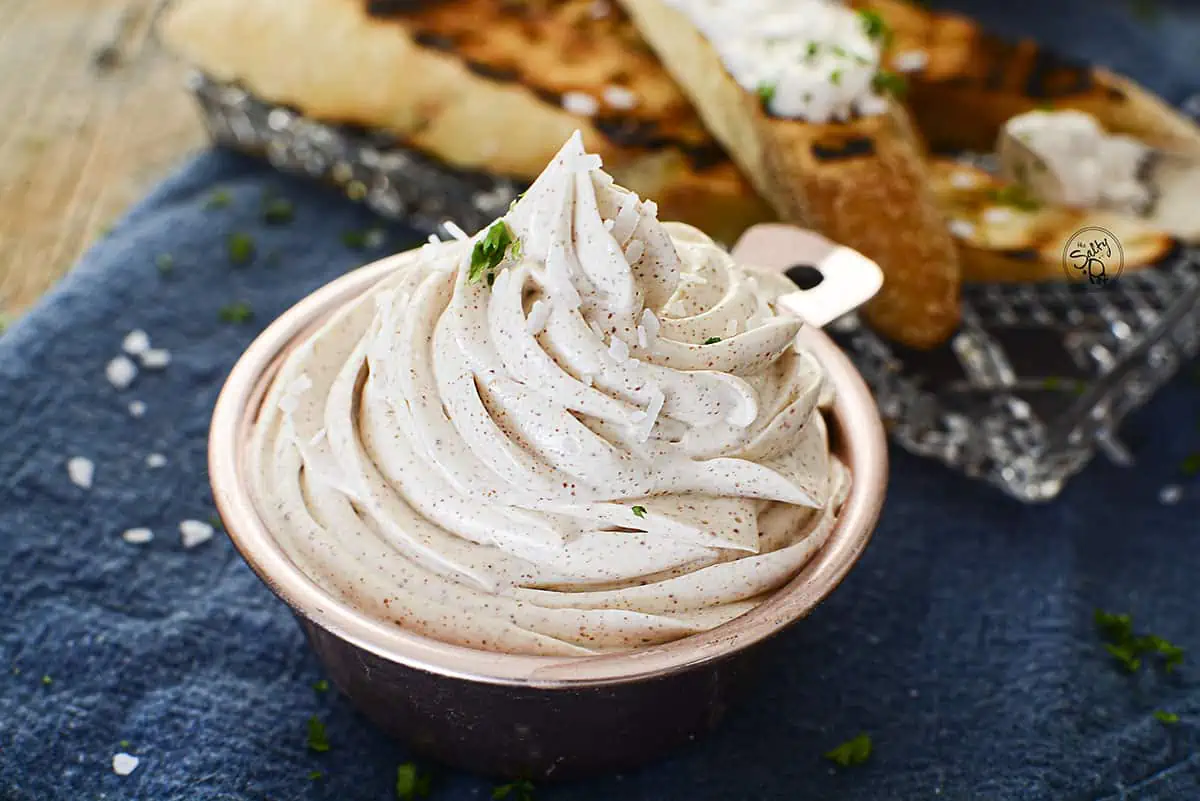
Whipping Butter: Why and How?
Whipped butter is airier and easier to spread. To whip butter, simply take softened, room-temperature butter and whip it using a mixer until it’s light and fluffy. It’s perfect for bread, muffins, or a lavish addition to baked potatoes.
It will also increase the volume by at least 50% or more, stretching your grocery dollar, and lowering the calorie count because you use less, and it tastes exactly the same.
I make Whipped Brown Butter which is absolutely one of the most delicious things I’ve tasted. It has a nuttiness that comes from toasting the milk solids and it transforms butter into something decadent and luxurious. Best of all, it’s insanely easy to make!
A Fun Activity For Kids
Making butter is an interactive and fun way to keep the younger kids engaged and occupied. They’ll love the magic of watching cream turn into butter, and it’s an educational experience about where our food comes from.
Tips And Ideas For The Best Butter
- Serve your freshly made butter on EVERYTHING. If you’re so inclined, try making this fresh No Knead Country Bread recipe that’s super simple, anyone can make it. Dollop fresh butter on warm vegetables, mix it into mashed potatoes, etc. The list is endless.
- Use fresh cream. The fresher the cream, the better the flavor.
- Be sure to remove as much of the buttermilk as possible.
- Add herbs, spices, or fruit zest to create your unique butter flavors.
- Homemade butter is a treat on freshly baked bread, in pasta dishes, or even to sauté vegetables.
If you know me, you’ll know that I love learning the “old” ways our parents or grandparents used to do things. While it’s super convenient to buy butter at the store, with our economic climate and our grocery bills going up and up, it’s a good thing to try and save where we can.
Learning how to make butter at home is not only a fun thing to do but to venture into the old ways of doing things is always interesting and a great learning opportunity for little ones.
Whether you’re a newbie cook or a seasoned homesteader, there’s a certain joy in producing something as fundamental and delicious as butter. So roll up those sleeves and make some buttery magic!
How To Make Butter
Learning how to make butter is one of the easiest skills ever. Learn how to make yummy, fluffy, chemical free and wholesome butter all by yourself, the old fashioned way!
Ingredients
- 1 quart heavy whipping cream, chilled
- 1/2 teaspoon salt
Instructions
- Place chilled cream into a stand mixer
- Whip the butter until it forms peaks and makes whipped cream.
- Continue whipping it.
- After about 10 minutes, the whipped cream will begin to break and separate into butter and buttermilk
- Stop the mixer and pour off the buttermilk. With a spatula, press out as much buttermilk as possible.
- Rinse the butter with cool water while pressing the butter against the side of the bowl to squeeze out any more buttermilk. When the rinsing water remains clear, the butter is done.
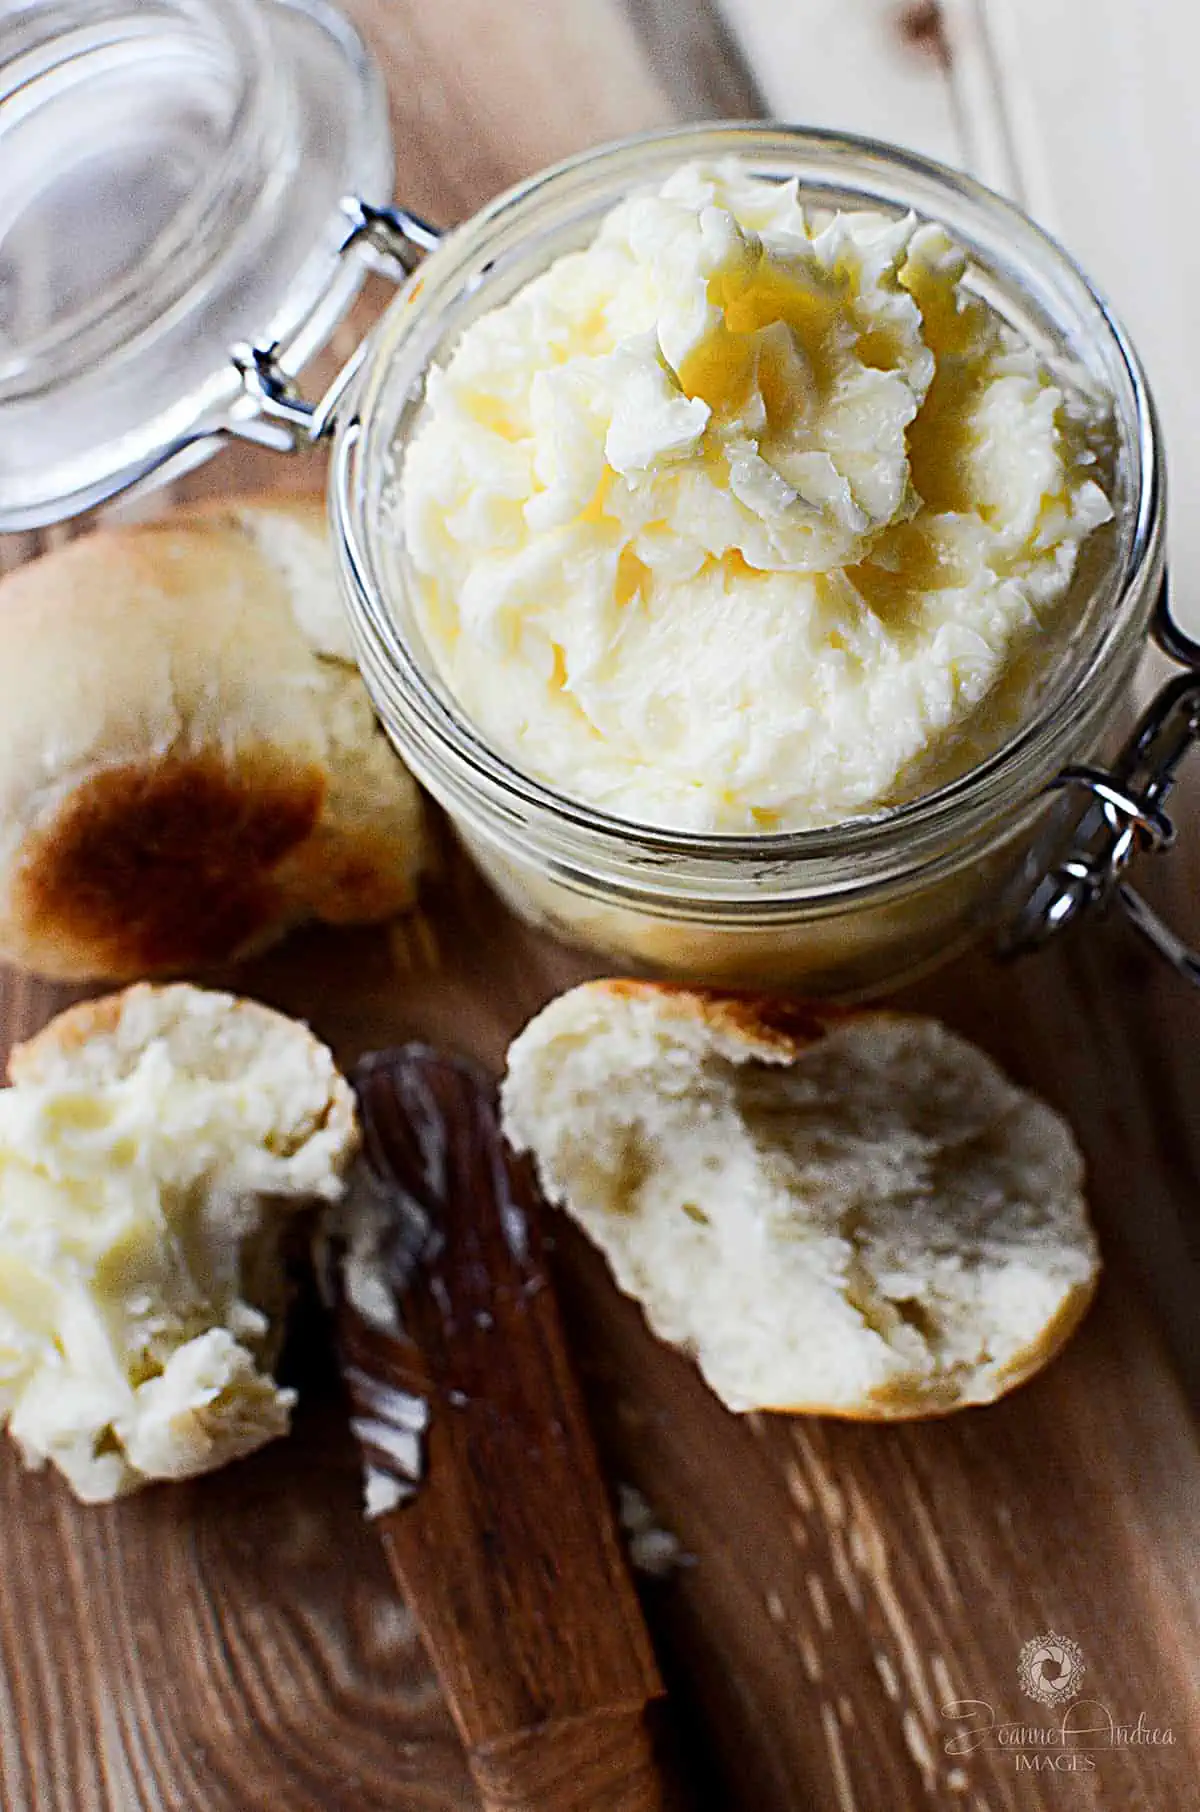
- Salt the butter by adding a pinch, mixing it, and taste it as you go to develop your desired amount.
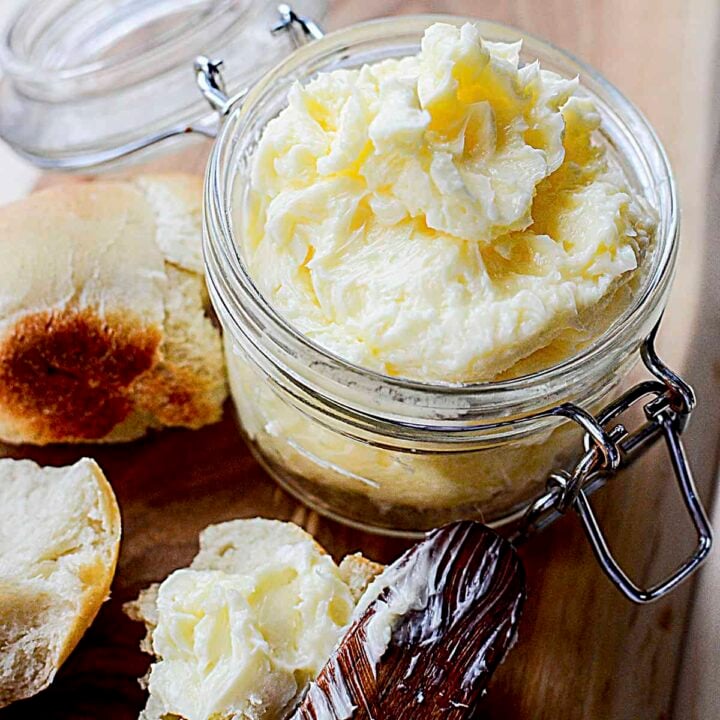
- Place into a sealed container and enjoy!
Notes
Check the body of the post for alternative ways to make butter without using a stand mixer.
Be sure to wash the butter thoroughly to remove the buttermilk in order for your butter to last the longest possible.
I like to keep the majority of my freshly made butter in the fridge (if I don't freeze the extras), and then spoon about half a cup into a container with a lid to keep it at room temperature. That way, it's easy to spread onto bread and it keeps the other butter tasting fresh in the fridge.
If you have extra butter that you won't use up in a short amount of time, butter freezes very well! Place in an air-tight container or wrap in plastic wrap and then place in freezer-friendly bags to keep it as fresh as possible.
Nutrition Information:
Yield: 32 Serving Size: 1 tablespoonAmount Per Serving: Calories: 101Total Fat: 11gSaturated Fat: 7gTrans Fat: 0gUnsaturated Fat: 3gCholesterol: 34mgSodium: 8mgCarbohydrates: 1gFiber: 0gSugar: 1gProtein: 1g
All nutritional information is based on third-party calculations and is only an estimate. Each recipe and nutritional value will vary depending on the brands you use, measuring methods, and portion sizes per household.
**********SAVE THIS RECIPE ON HOW TO MAKE BUTTER ON YOUR PINTEREST BOARD FOR LATER REFERENCE! **********


Hi! How long is the butter good for? Does it need stored in the fridge or airtight container?
Hey there Ally! Thanks for commenting with your question. The butter will stay good (as long as it’s been ‘washed’) for up to two weeks in the fridge. If I have store-bought butter, I will store it at room temp, but if I make my own, I prefer to keep in the fridge, definitely in an air-tight container.
Now I’m angry with myself because I’ve thrown away heavy whipping cream that curled up in the mixer when making whip cream. How long will the butter stay good for.
Awwww Vanessa, that’s too bad!! But at least you know now not to throw that away!
The butter should stay nice for at least a few weeks covered in the refrigerator, or covered on a counter, about 2 weeks (as long as it’s not too hot!) lol.
I haven’t made homemade butter in ages and you’ve just reminded me of how easy and delicious it is. Thanks for sharing on MM.
Not a problem Erlene! I love making my own butter, I feel like I’ve accomplished something.. haha! Thank you for taking the time to comment!!
I never realized how easy making butter was and what a neat process. And OMG soooo good! Thank you for the great pics and well written instructions!
You’re so welcome Cherie, and I’m thrilled that you tried it!! It’s so cool and so easy right?? Yaay!! Thanks so much for taking your time to comment!
I’m definitely going to try this as I would also use the buttermilk for pancakes. How much butter and buttermilk does the 2 cups of whipping cream make?
Hi Jacqueline! Thank you for taking your time to write in! I find that the recipe will make about a cup or a cup and half of butter.
The butter milk would be PERFECT for pancakes, absolutely!
I’d love to hear your opinion of the recipe when you try it!
That sounds easy for me will try it, thank you.
That’s the best thing about this recipe, it IS super easy! Let me know how it goes when you try it, I’d love to hear what you think of the taste Lusiana!!
A blender works great for this
Great tip Beth, thanks for commenting!
I have always known how to make butter, just never have, HOWEVER, I NEVER KNEW ABOUT THE BUTTERMILK! Even though it makes so much sense. Thank you so much!