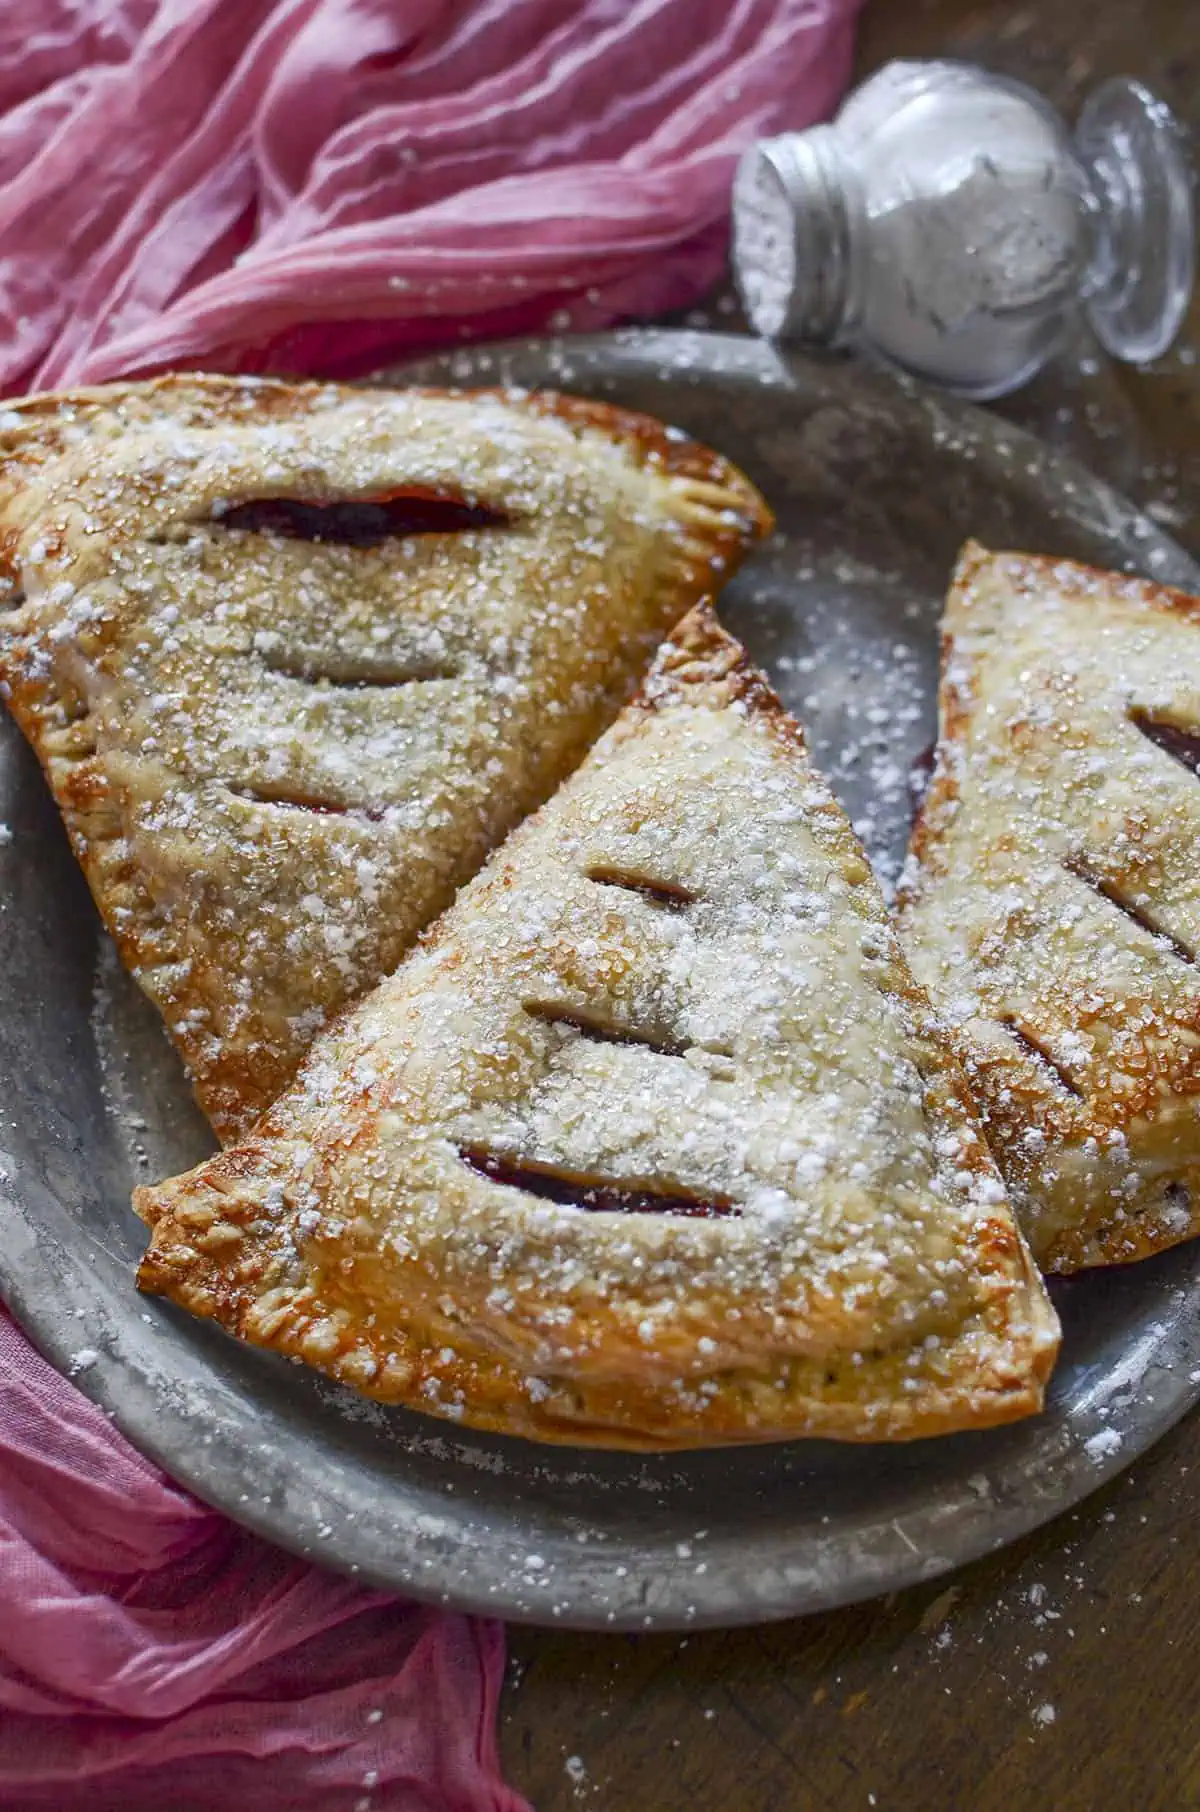
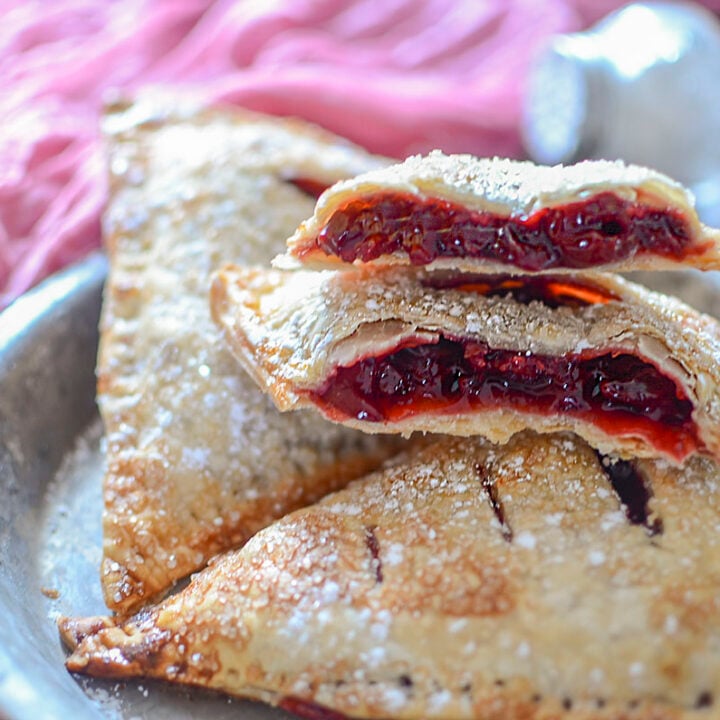
Sweet Cherry Hand Pies (Only 2 Easy Ingredients!)
If there’s one thing I know, it’s that these sweet cherry hand pies made with just two ingredients will save your butt when dessert needs to happen fast and the baking energy is just not there.
Ready to eat in under 30 minutes, these are fast, flaky, sweet little pockets of joy that I like to make that don’t require you to boil a single cherry or roll a single thing from scratch.
Just unroll, cut, fill, cover, bake, boom. Done. Nice and easy, right?
Now, I do have slightly fancier hand pies on the blog – like my Sour Cherry Hand Pies (little sweet/tangy rebels, those ones), or even a savory Chicken and Asparagus hand pie recipe that’s perfect for lunch or an easy dinner.
But this version? This is your emergency pie. Your “guests-are-arriving-in-20” pie. Your “it’s been a day and I need carbs + sugar immediately” pie.
🛒Ingredient Notes
- ✅Strawberry rhubarb pie filling – No eye rolling here. I said these were 2-ingredient hand pies, so this is one of the easy ingredients. If you’re motivated, please feel free to make your own strawberry rhubarb filling from scratch.
- ✅Pie dough – Same thing here. I usually always use Pilsbury pie dough because it’s easy, and like my pretend boyfriend, Jamie Oliver, always says, can I make it? Yes. Should I? Why? The shops do a good job of that sort of thing- and I agree with him.
- ✅Optional Ingredients – Egg – For an egg wash to make them golden toasty in color, and Coarse Sugar – I like to add this to the tops just for added texture and well,.. sparkle.
❗Important to Know Before You Make These
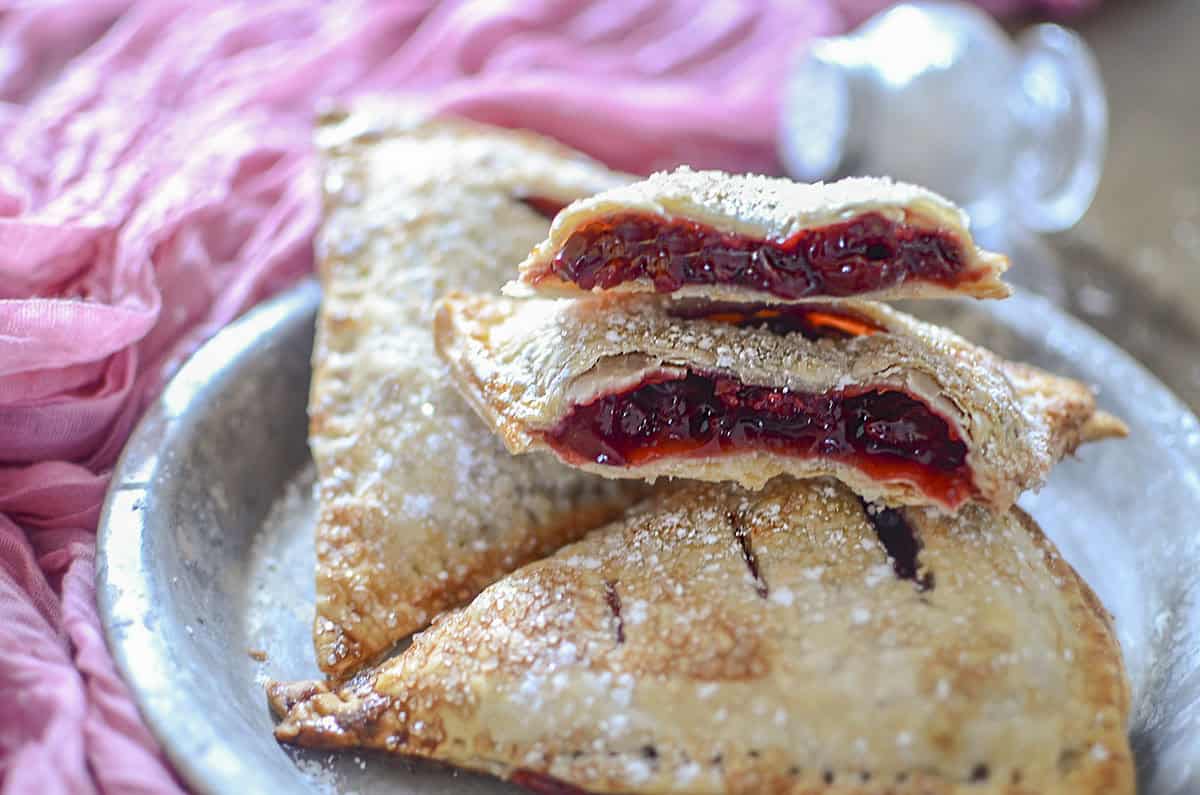
- Don’t overfill them – You’ll want to. You’ll think, “this doesn’t look like enough filling.” That’s the trap. The moment these babies get too juicy inside, they’ll blow a hole and all your work will look like a Jackson Pollock painting.
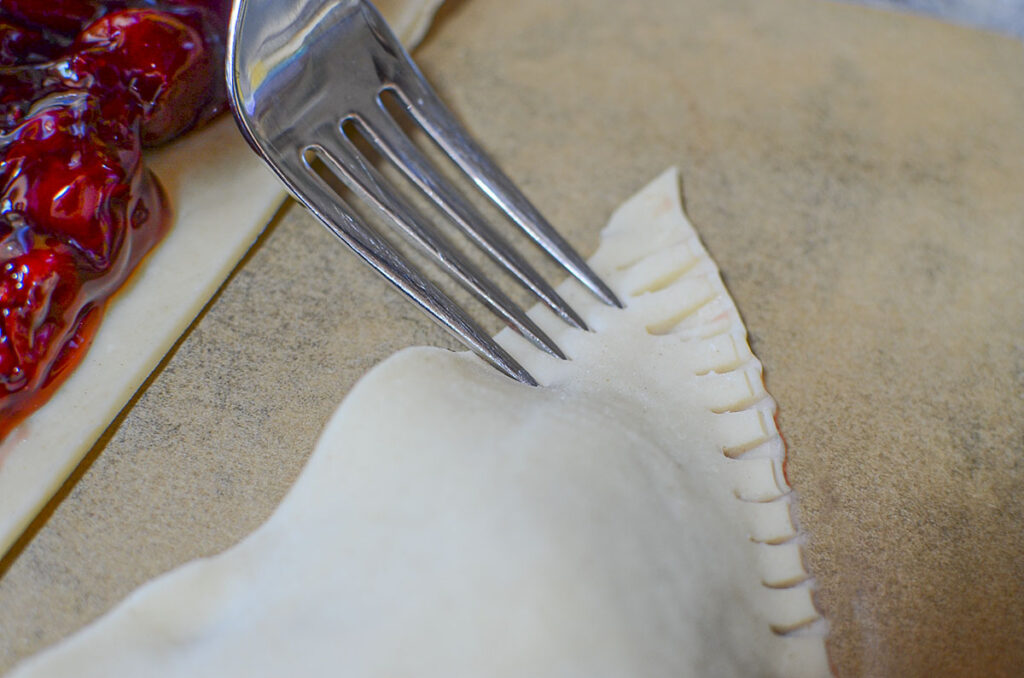
- Seal them well – Use a fork, press firmly, and don’t skip the water if you want them to actually stay closed. Remember, the little slit on top helps steam escape and keeps things tidy, so it’s pretty important to have them there.
- Cool before eating – The filling is molten sugar lava straight out of the oven. Let them cool a bit or risk third-degree burns and a ruined t-shirt.
- Yes, it’s barely a recipe, I know that – But when life’s rough, you’re short on time, or the filling is on sale, who’s got time to make it from scratch? (But if you do, here’s a homemade cherry pie filling that’ll knock your socks off.)
Photo Directions To Make Cherry Handpies


Please refer to the printable recipe card below for exact amounts, detailed instructions, and helpful tips to make this recipe perfect every time.
Recipe Tips
- Want them extra golden? Don’t skip the egg wash. It’s like makeup for pastry.
- These freeze great once baked. Thaw and tent with foil, then reheat at 350°F for about 10 min.
- Try this with other pie fillings if cherry isn’t your thing—blueberry, apple, even lemon.
Dessert doesn’t have to be fussy, and these little guys prove it. I hope they bring a little cherry-flecked joy into your day, whether you’re serving them up at brunch, stashing a couple in the freezer, or eating one with your coffee at midnight.
No judgment here. Thanks for stopping by and I’ll see you next time!
~ Joanne
2 Ingredient Cherry Hand Pies
This 2-ingredient cherry hand pie recipe is your secret weapon for fast, no-fuss desserts. Just pie crust and cherry filling—perfect for last-minute cravings or easy entertaining.
Ingredients
- 1 box refrigerated pie crust (2 rounds)
- 2 cups cherry pie filling
- Optional:
- 1 egg + 1 tsp water (for egg wash)
- Coarse sugar, for sprinkling
Instructions
- Preheat oven to 375°F (190°C). Line a baking sheet with parchment.
- Unroll the pie crusts onto a lightly floured surface. Cut into pie shapes using a sharp knife or I use a pizza cutter.
- Using your prepared pie filling, spoon 2-3 tablespoons of the filling into the center of one of the slices of dough. Be sure that the filling is spread over the slice, going towards the smaller end as well, but keep a 1/2" edge on all sides for sealing. (refer to photo in the body of the post).
- Dip your finger in some water and trace the edges of the dough slice with the filling. Place another dough slice on top of the one with the pie filling. With a fork, crimp the edges of the two slices together.
- With a sharp knife, cut 2-3 slits into the top of the dough for venting while it bakes.
- Brush with egg wash and sprinkle with coarse sugar if desired.
- Bake 15–18 minutes, or until golden brown and bubbling.
- Cool before eating.
Notes
Don’t get greedy with the filling. Just put enough so there is a 1/2 inch margin around the boundary of each pie dough section. Overfilling will cause it all to leak out in the oven.
If the top piece of dough is too small to cover the other piece with the filling on it, lightly roll out the top piece with a glass or rolling pin to that it can cover the filling on the bottom slice.
→ With a scoop of vanilla ice cream (go classic)
→ A dollop of whipped cream and lemon zest = fancy
→ Drizzle with glaze and serve warm for a handpie hug (comfort food).
→ Or eat one cold, straight from the fridge like a goblin - you do you
Nutrition Information:
Yield: 6 Serving Size: 1Amount Per Serving: Calories: 232Total Fat: 8gSaturated Fat: 3gTrans Fat: 0gUnsaturated Fat: 5gCholesterol: 31mgSodium: 145mgCarbohydrates: 36gFiber: 1gSugar: 2gProtein: 3g
All nutritional information is based on third-party calculations and is only an estimate. Each recipe and nutritional value will vary depending on the brands you use, measuring methods, and portion sizes per household.