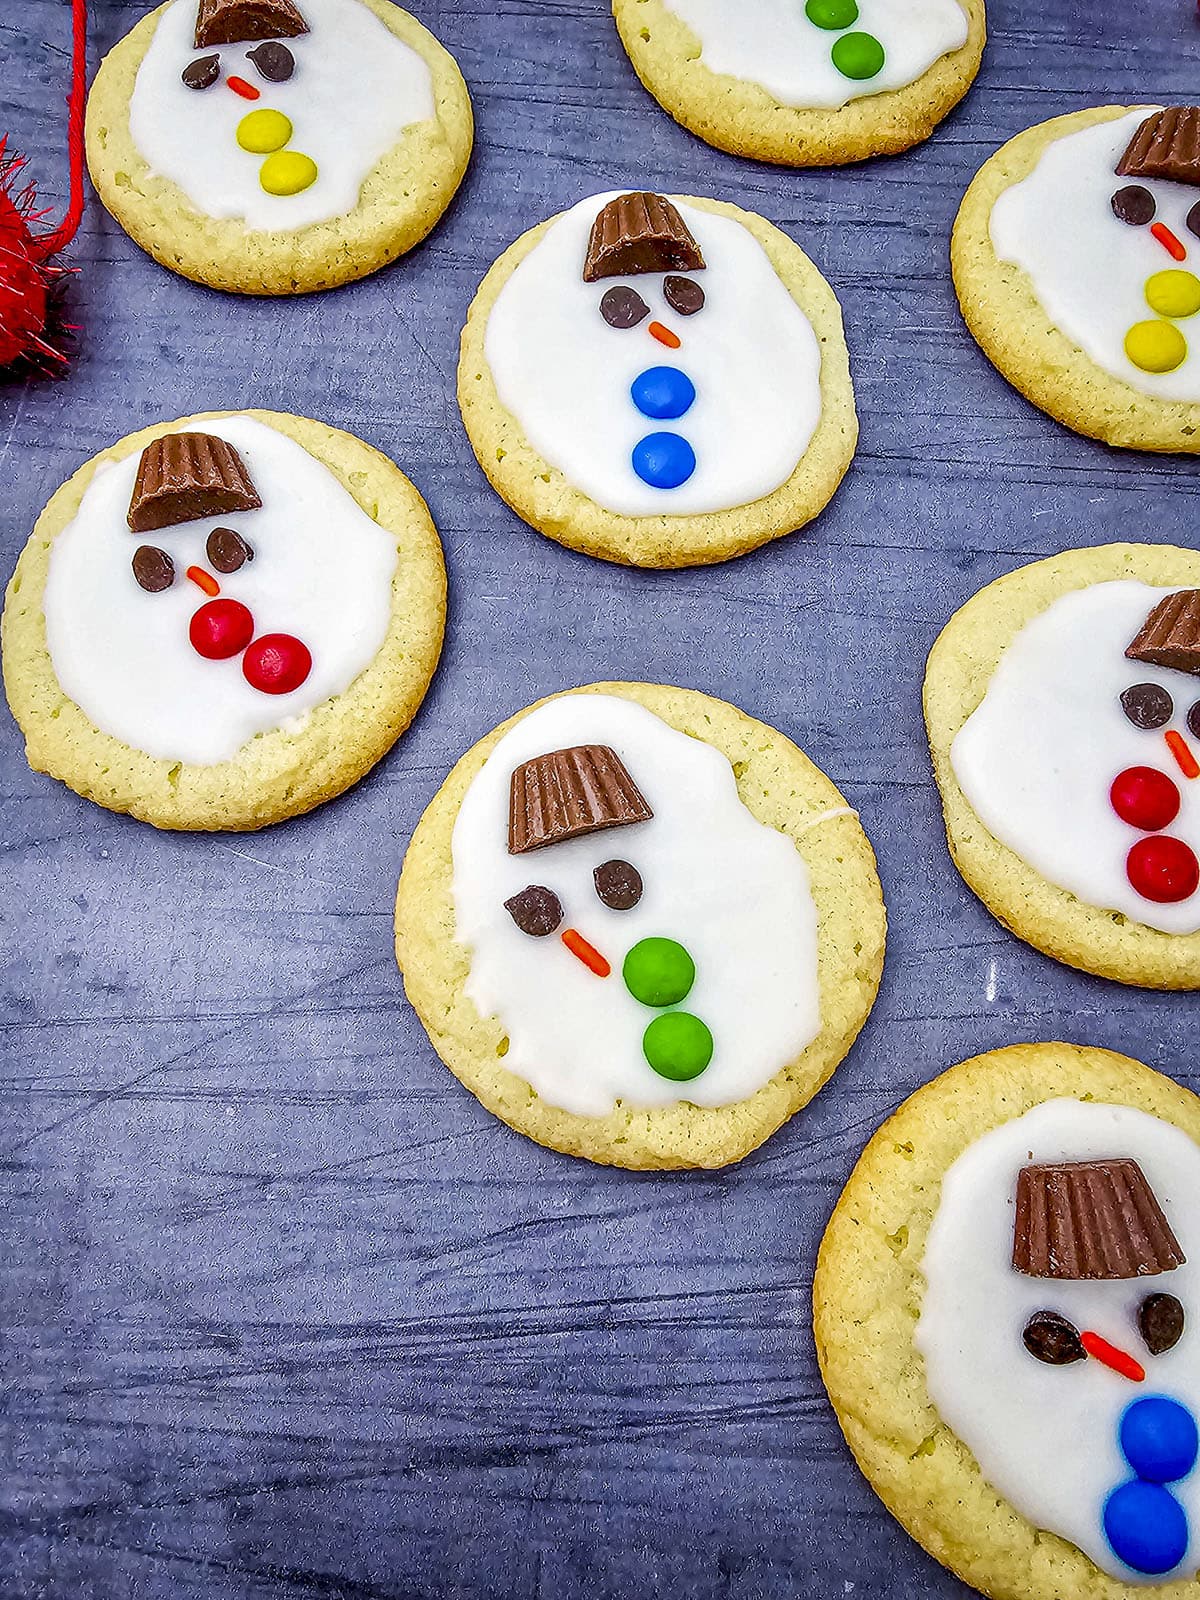
Melted Snowman Sugar Cookies (Ridiculously Cute + Insanely Easy)
You know those Christmas treats that are so stinkin’ adorable you almost feel guilty eating them?
Yeah… these Melted Snowman Sugar Cookies are exactly that.
They’re whimsical, melty-in-the-best-way, and honestly? They’re also ridiculously easy thanks to the sugar cookie dough shortcut (my personal holiday love language).
Perfect for Christmas parties, cookie exchanges, classroom treats, or something fun to make when you want to give “I worked my butt off” impressions without making 47 bowls of homemade dough.
(And listen, I’m a cookie girl, not a martyr. Store-bought dough is absolutely allowed.)
⭐ Why You’ll Love These
- Stinkin’ adorable without needing piping skills
- Start with premade sugar cookie dough → saves your sanity
- Kids lose their minds over these
- Great for gifting, trays, exchanges, or “oh crap, I forgot the office treat” emergencies
- They always get compliments because people think you spent hours on them ( and you know you worked smarter, not harder )
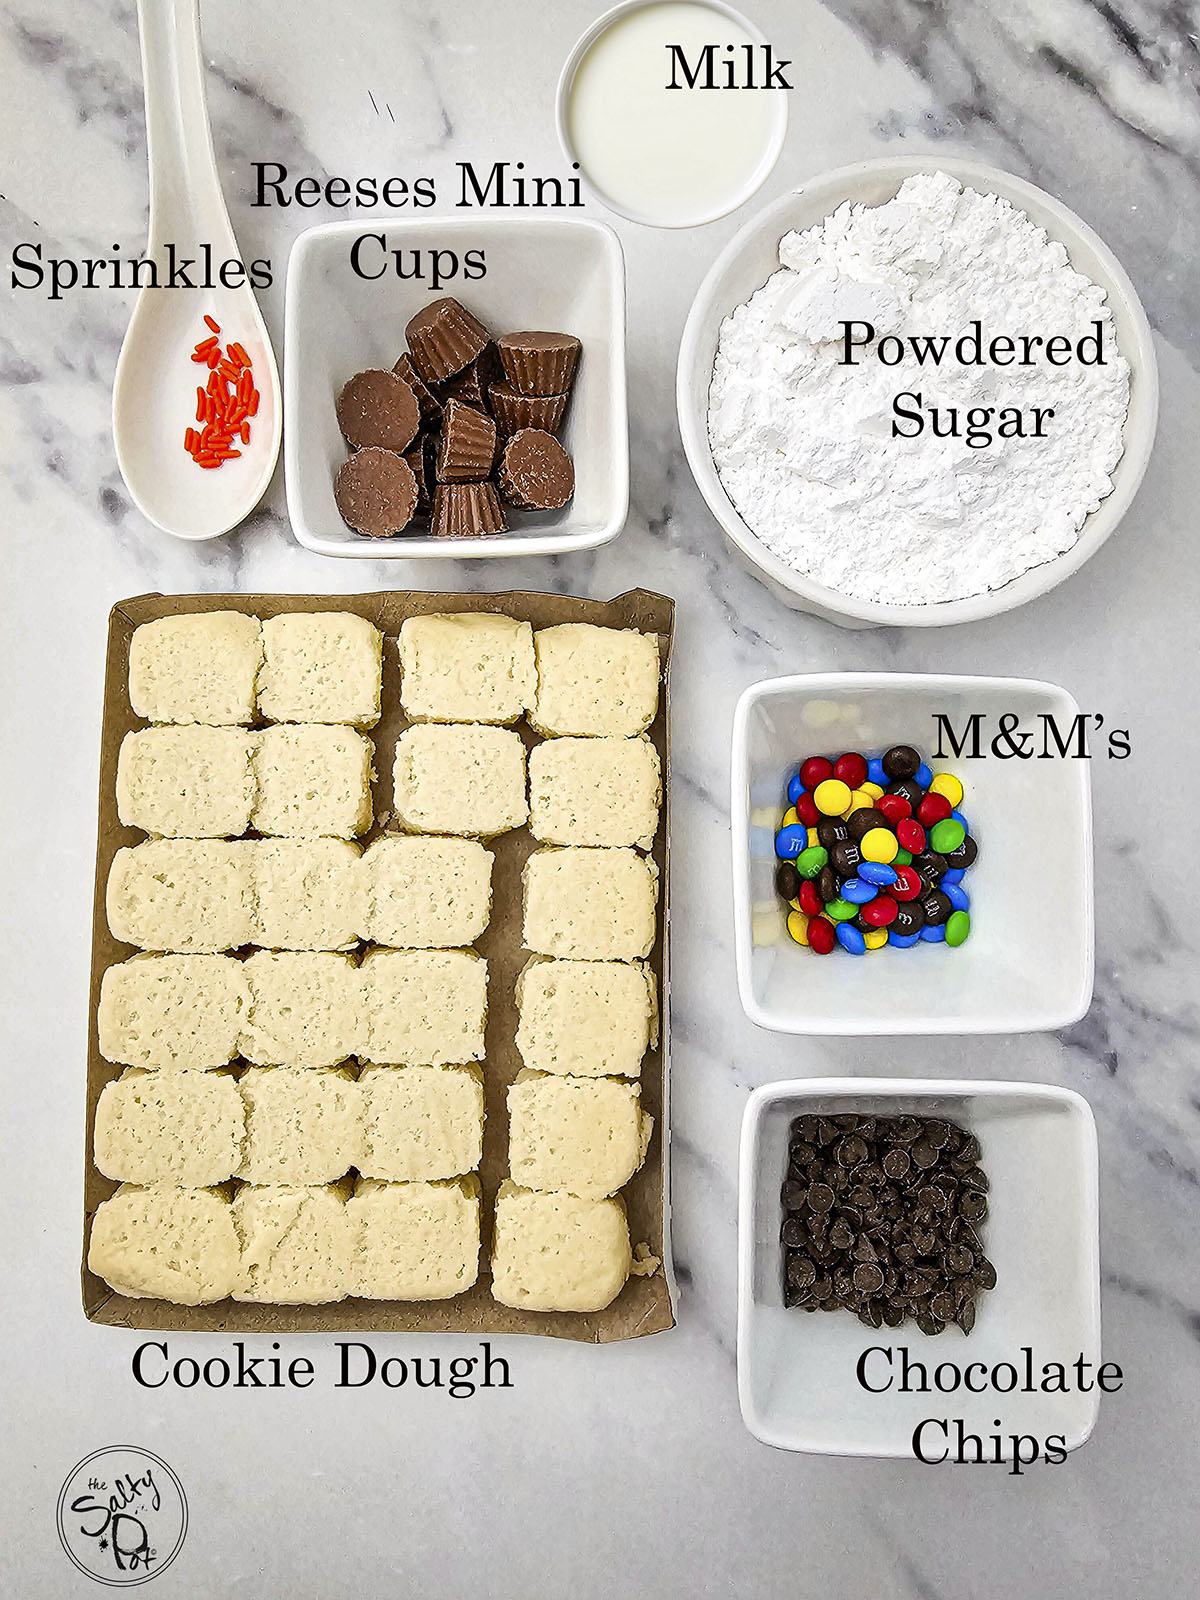
🛒 Ingredients & Quick Substitutions
- ✅ Ready-to-bake sugar cookie dough (16 oz): I like the Pillsbury or your local store brand is just fine. (Sub: Premade bakery sugar cookies if you’re in survival mode.)
- ✅ Powdered sugar: This (with the milk) forms the snowy “melty” icing. (Sub: Use store-bought white cookie icing if you don’t want to mix your own.)
- ✅ Milk: Thins the icing. (Sub: Half-and-half or water works in a pinch.)
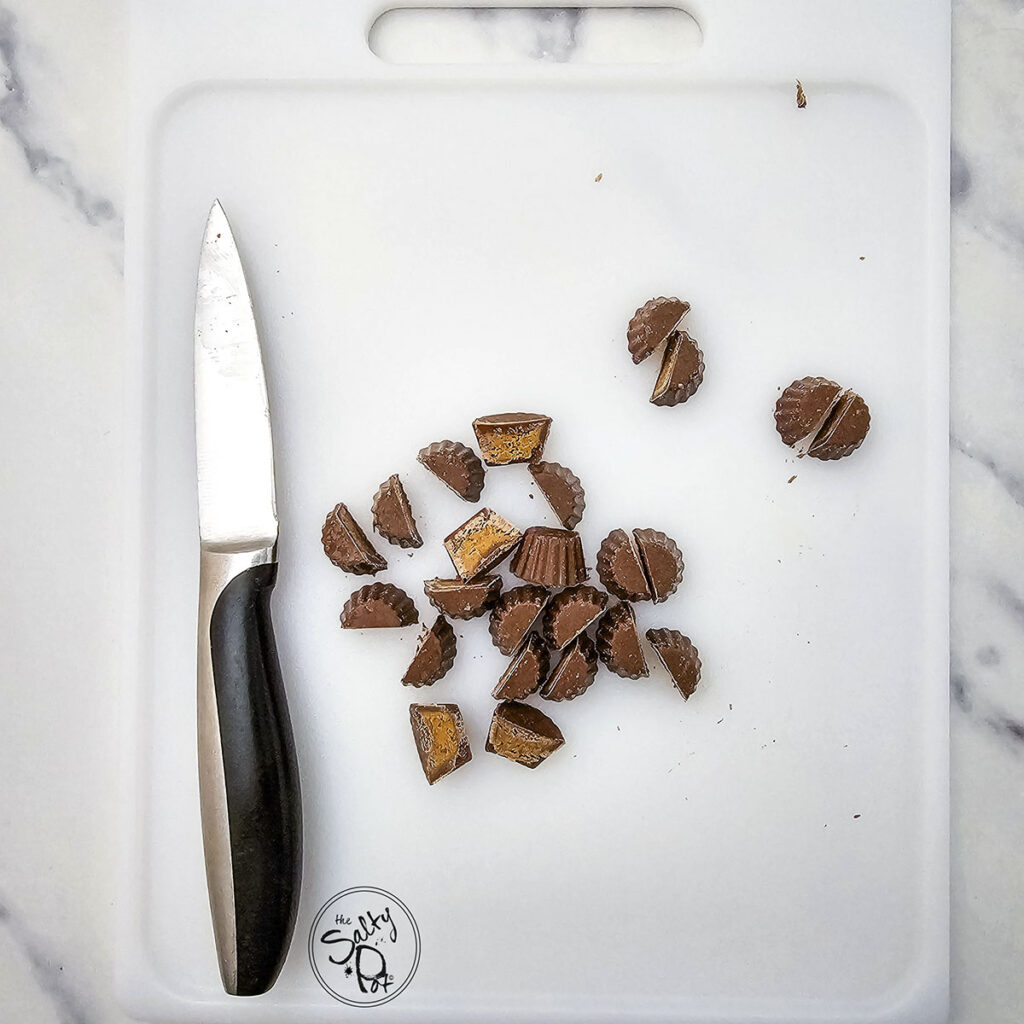
- ✅ Mini Reese’s Cups (for the hats). (Subs: Mini Oreos, Rolos, Cut marshmallows, Hershey’s Kisses (turned sideways so they look “melty”))
- ✅ Mini chocolate chips: Forms his eyes. (Sub: Black sprinkles or edible marker.)
- ✅ Orange sprinkles: Makes his carrot nose. (Sub: Snip tiny pieces of orange Starburst or an orange Tic Tac (LOL kinda big but yes)
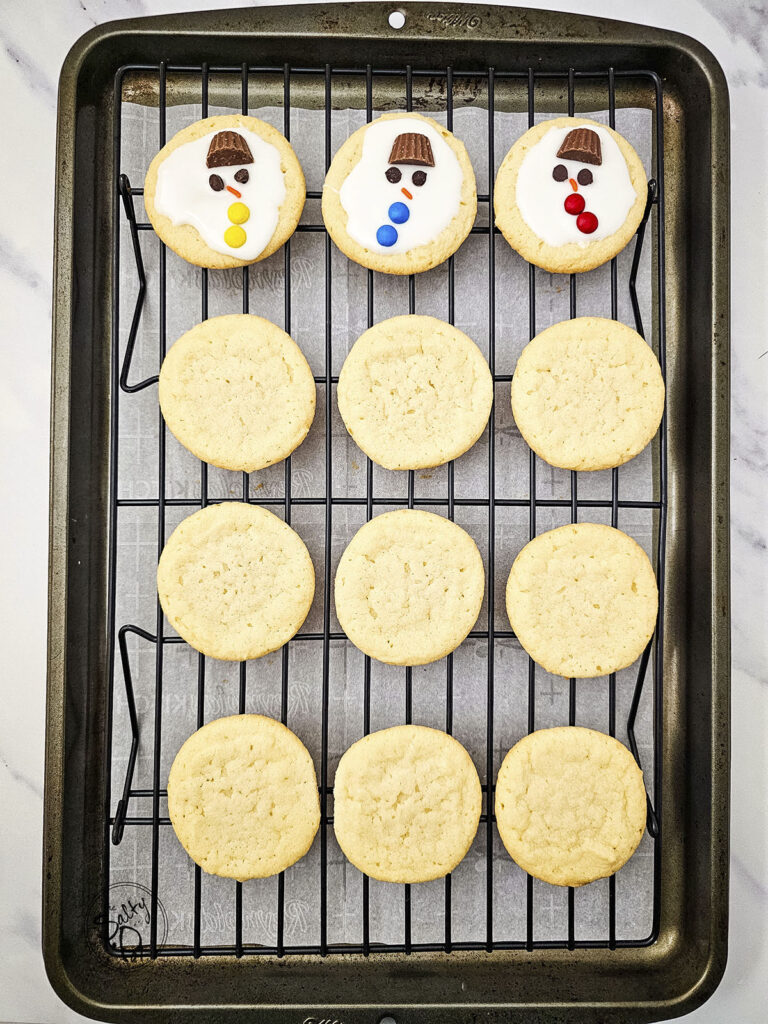
- ✅ Mini M&Ms: His buttons. (Sub: Skittles, Nerds, or whatever tiny candies you have)
👩🍳 How to Make Melted Snowman Sugar Cookies
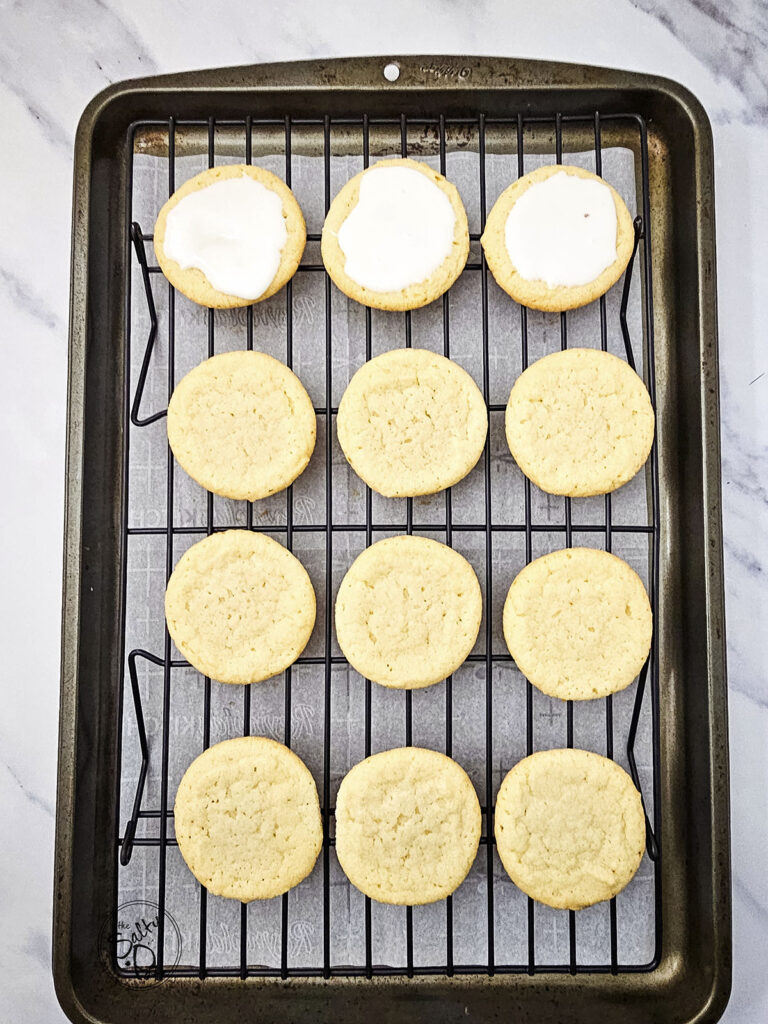
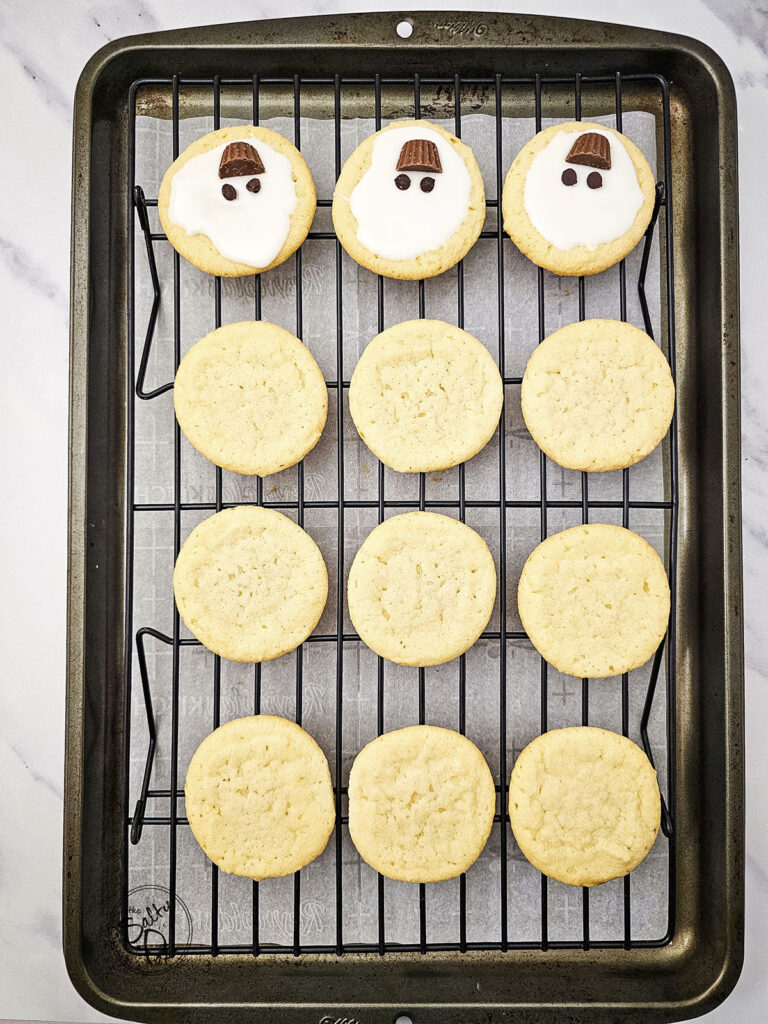
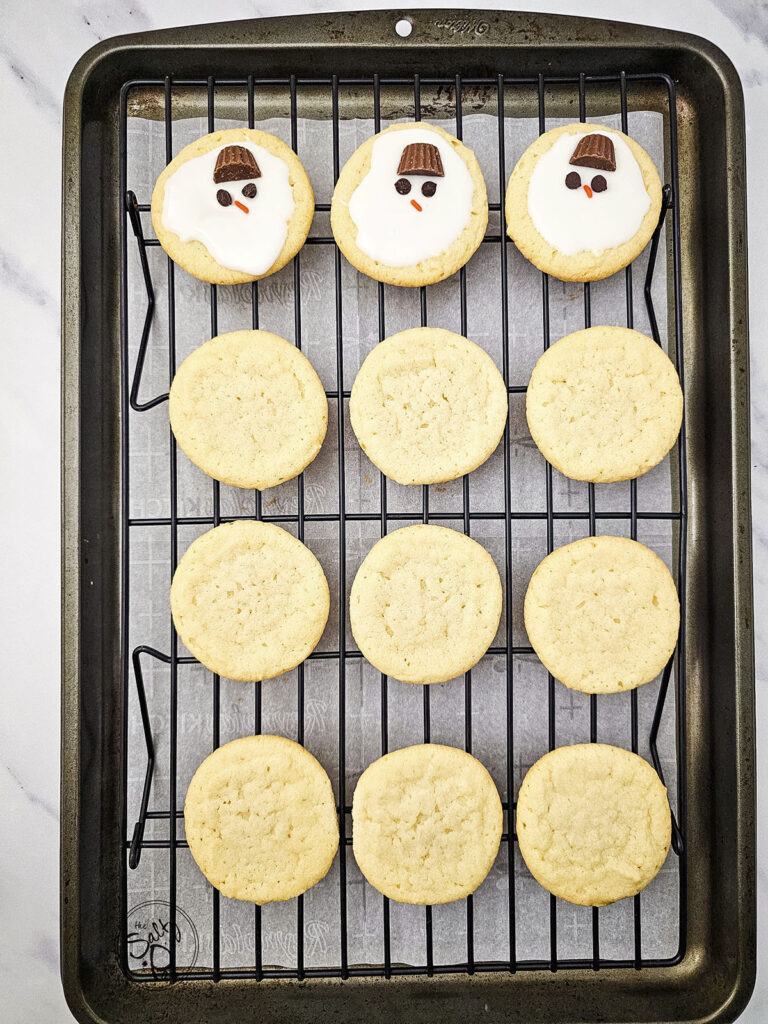
- 1. Bake the Cookies: Start by baking the premade sugar cookie dough according to the package directions. Place the dough pieces on a lined baking sheet with enough room to spread. Bake until lightly golden around the edges, then cool on the sheet briefly before moving them to a rack to cool completely.
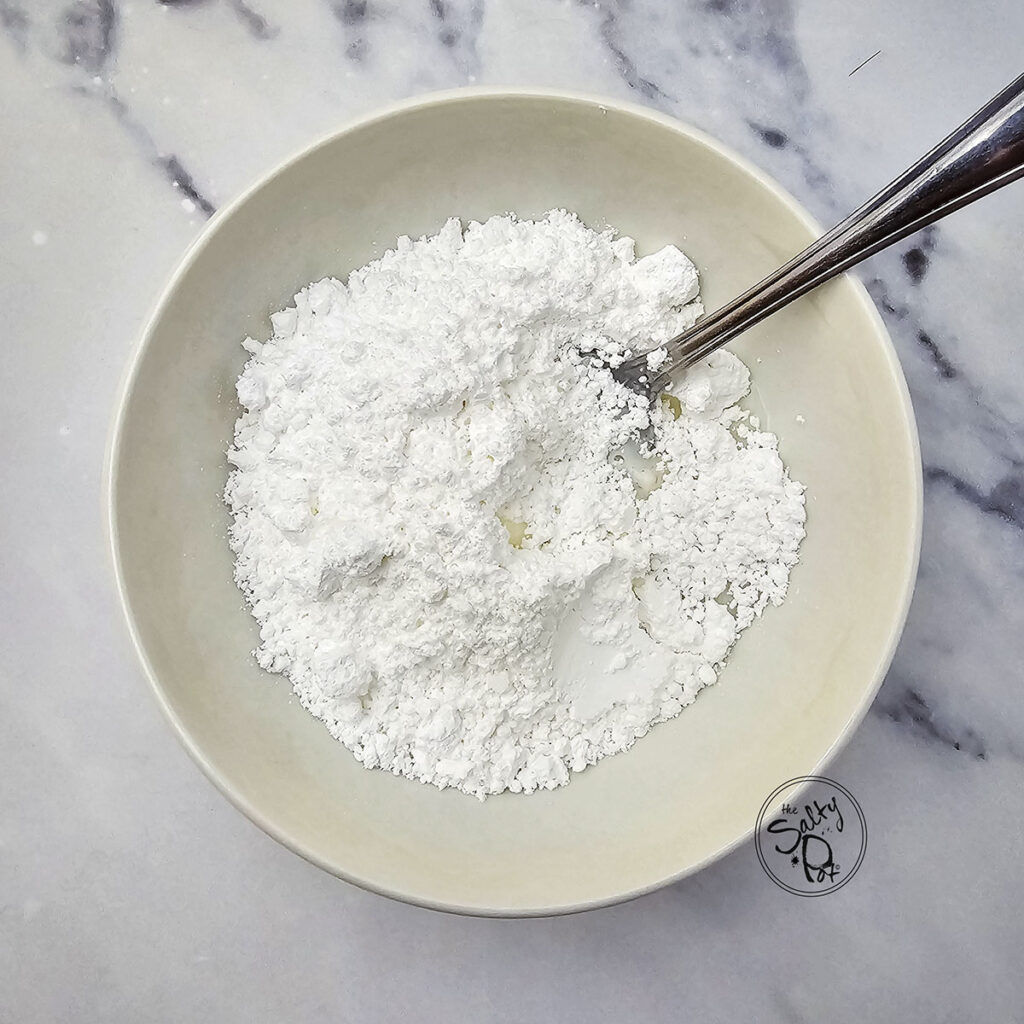
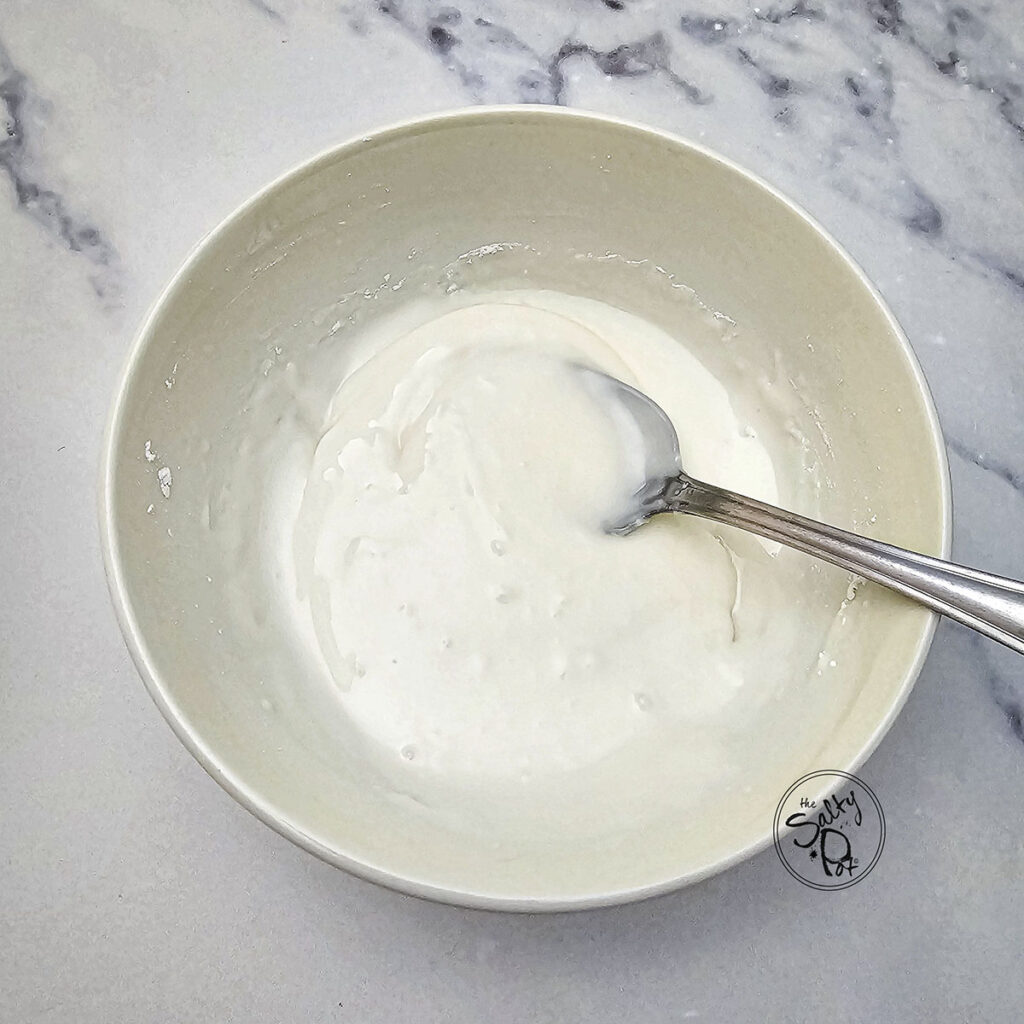
- 2. Mix the Icing: In a small bowl, whisk powdered sugar with just enough milk to make a thick, pourable icing. It should ooze slowly when spooned — not run everywhere, not sit like putty. Add tiny splashes of liquid as needed until it reaches that “melty snow” consistency.
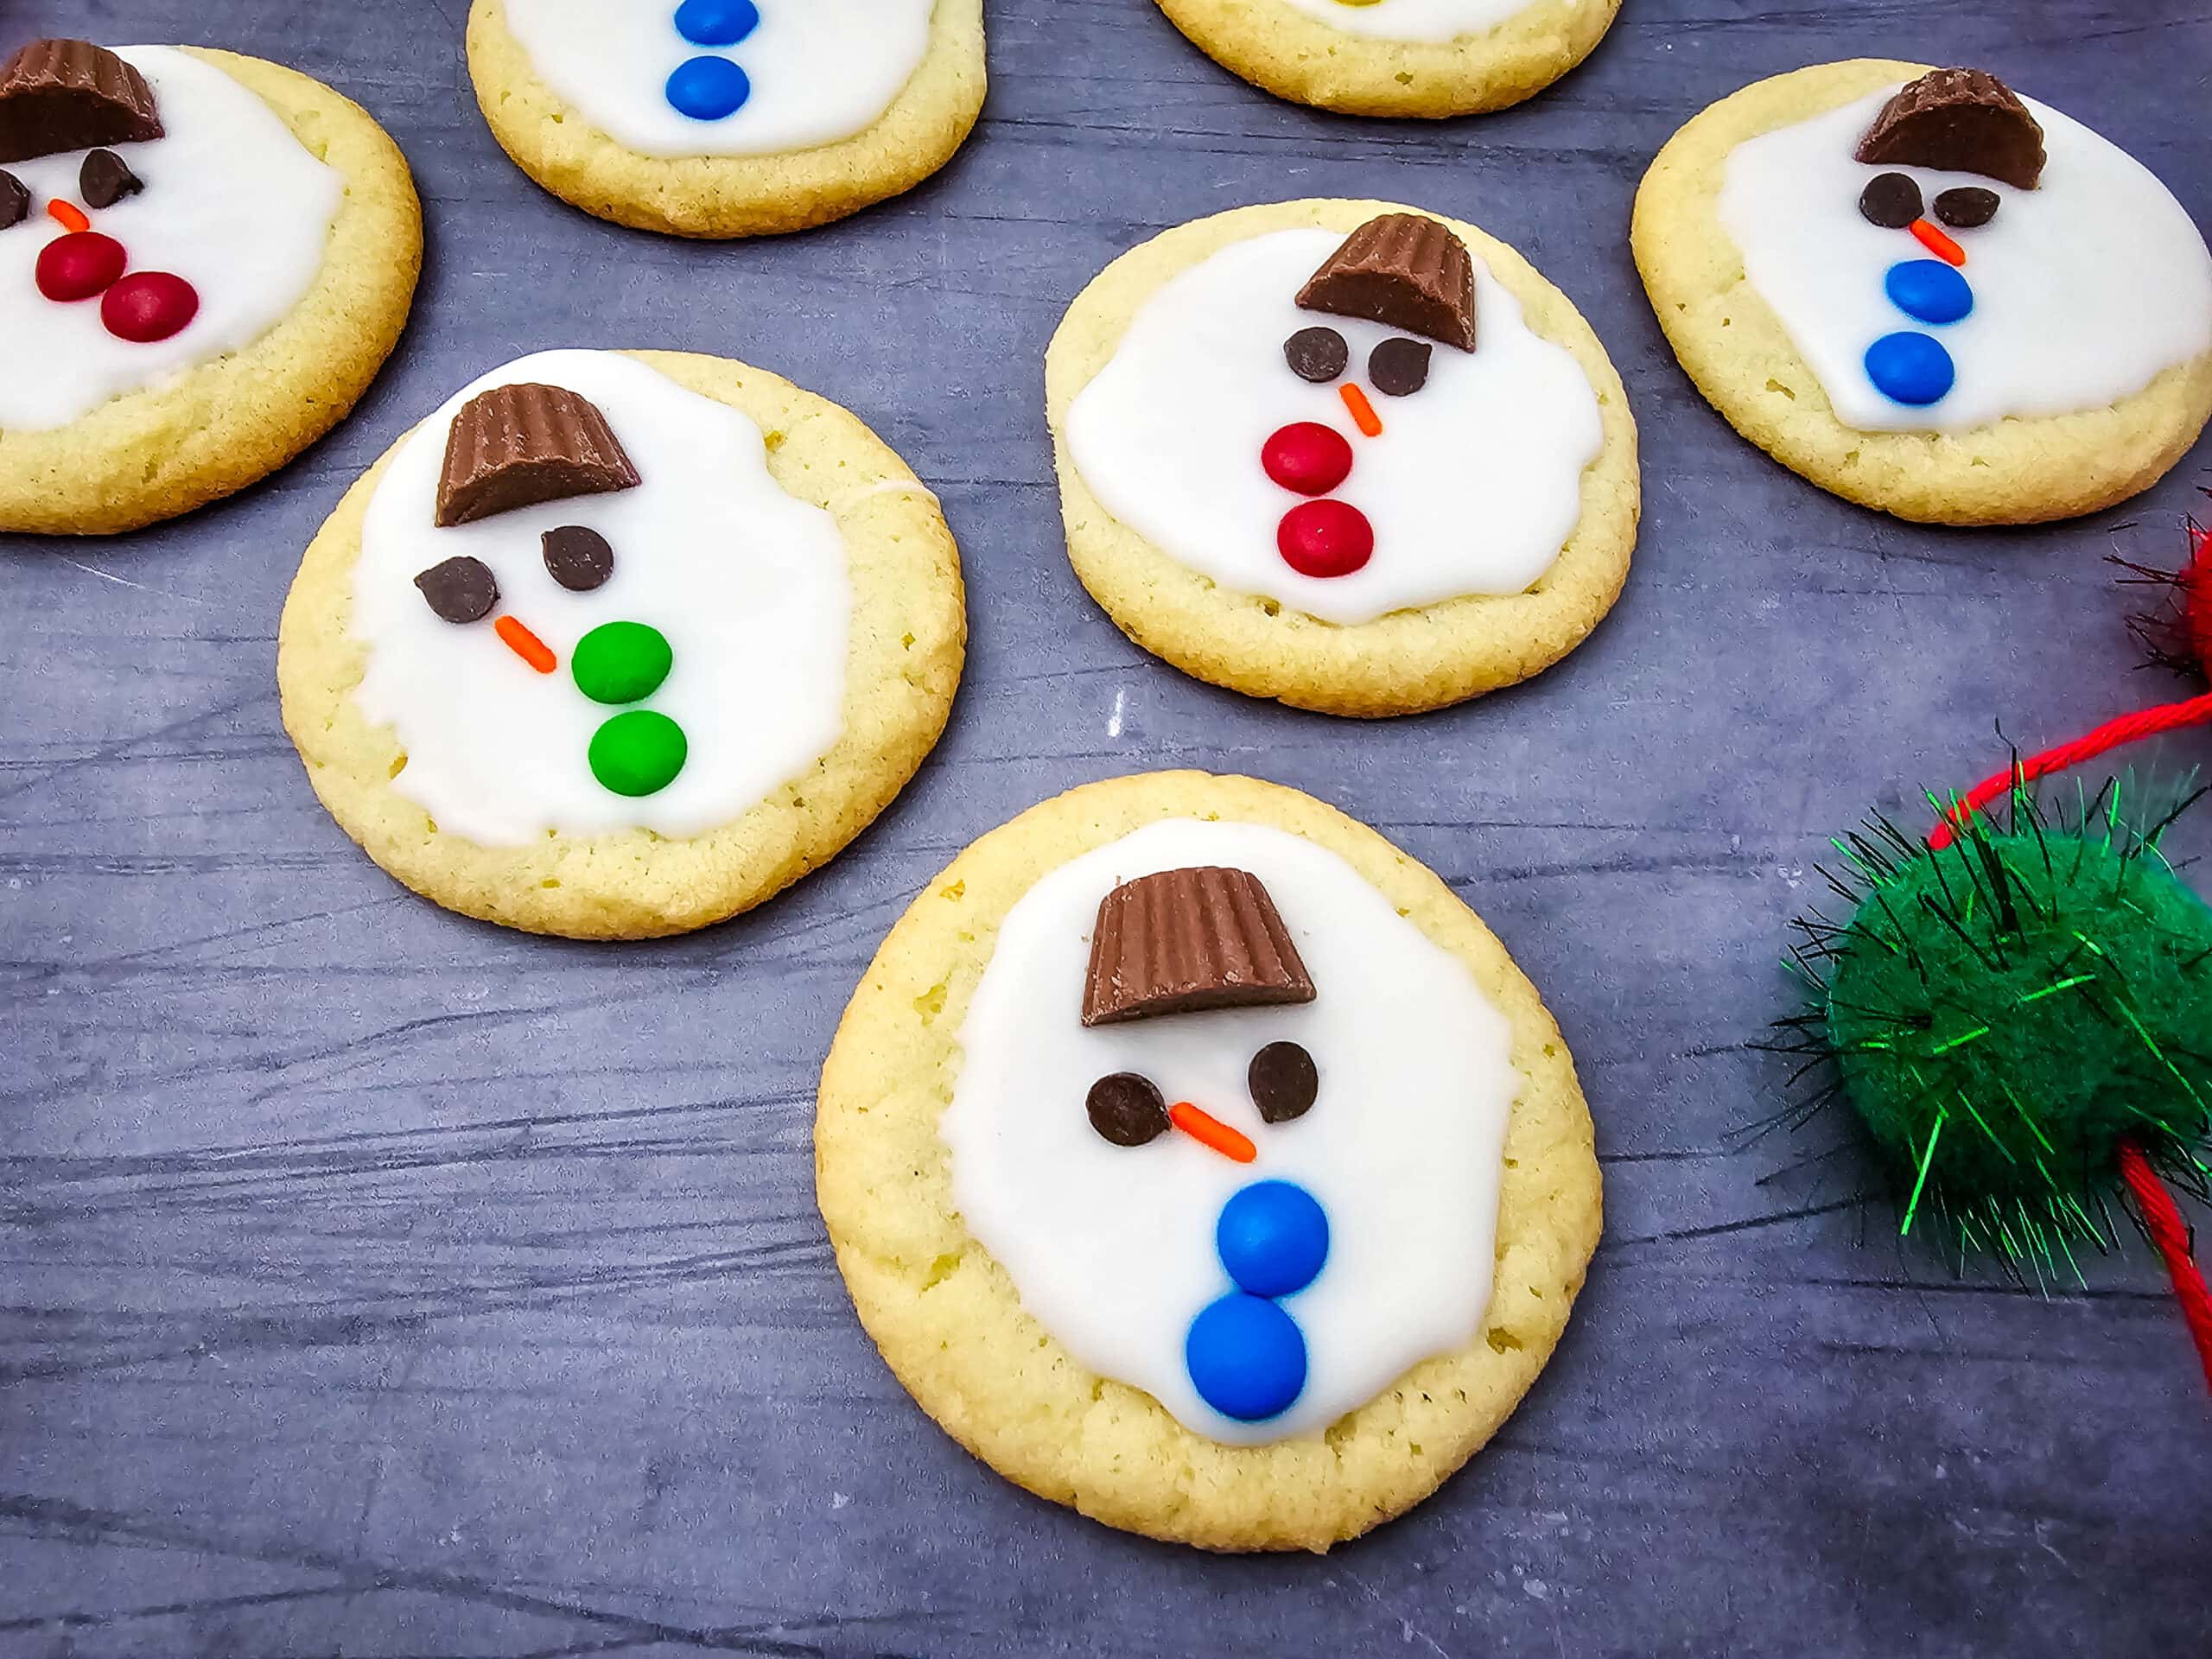
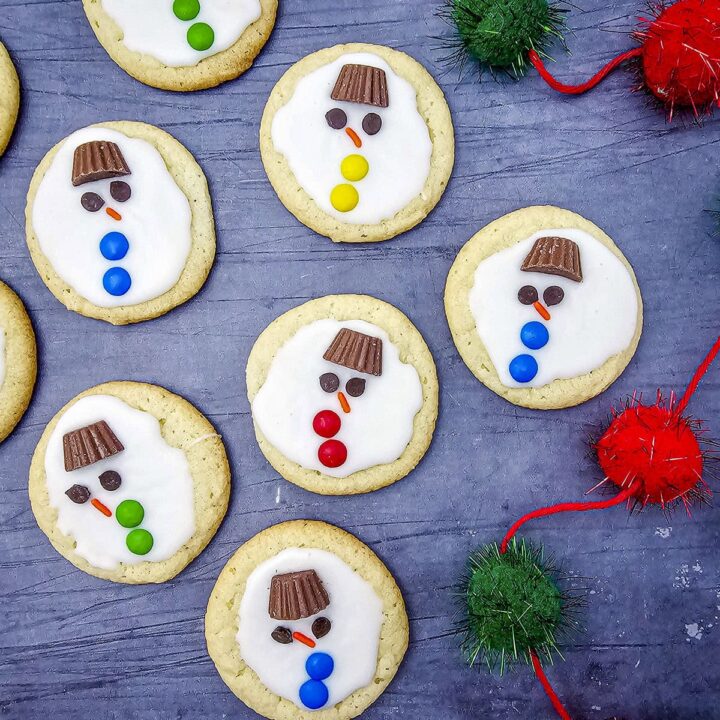
- 3. Create the Melted Look: Spoon a little icing into the center of each cooled cookie and let it naturally drift outward. Uneven edges look the most realistic. A slightly warm cookie sheet placed under the rack can help the icing spread organically (warm, not hot).
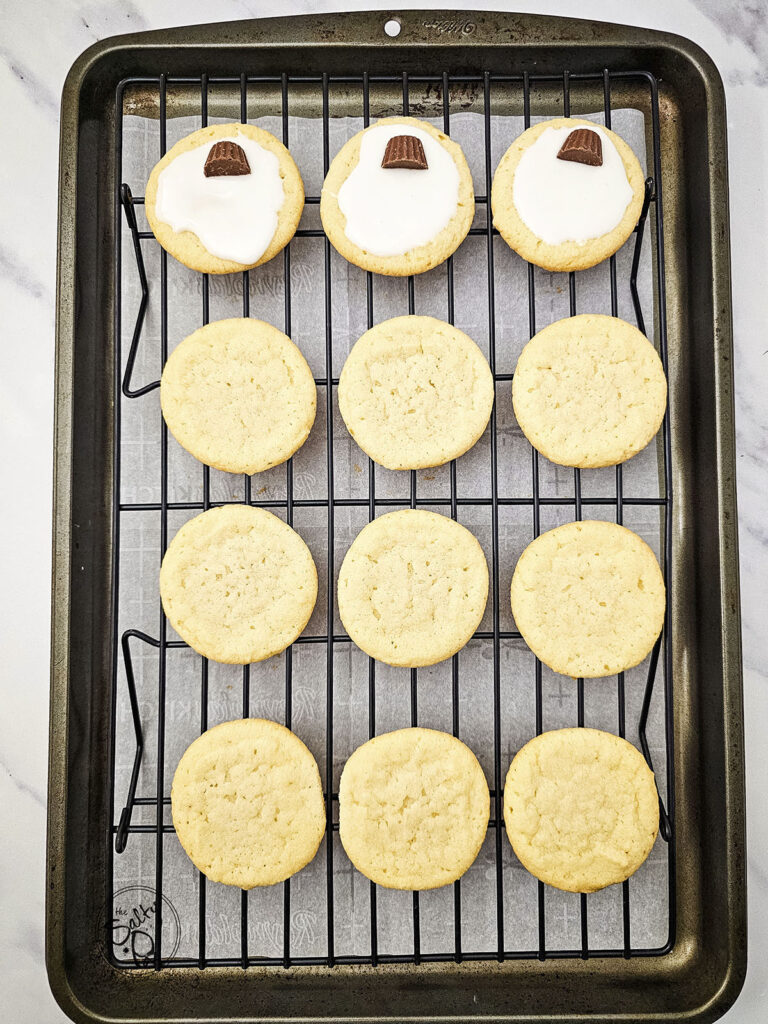
- 4. Add the Snowman Details: Before the icing sets, decorate with the hat, eyes, nose, and buttons. Tilting the hats to one side or mixing button colors gives extra personality. Small cracks that form in the icing as it settles also mimic that “melting snow” effect.
- 5. Let Them Set: Allow the decorated cookies to sit until the icing firms up enough to handle or package. Exact times and measurements are all in the recipe card below.
Please refer to the printable recipe card below for exact amounts, detailed instructions, and helpful tips to make this recipe perfect every time.
🍽 Serving Ideas
Serve these with:
- Hot cocoa
- Eggnog
- Spiced Rum Hot Chocolate
- My Classic Whipped Shortbread Cookies
- Santa’s Whiskers Cookies
- Festive Eggnog Cookies
- Reindeer Wagon Wheel Cookies
Kids love them on cookie trays. Adults mysteriously do too.
🧊 Make-Ahead & Freezing (Salty-Style Portion Freezing)
Freezing the Cookie Bases (Recommended)
For best results, freeze the cookies undecorated for perfect solo-portion freezing (Salty-style):
Freeze 4 – 6 cookies together per small (freezer friendly) container so you can grab just what you need later. Thaw, then decorate.
Saltypot Note:
While I haven’t frozen decorated Melted Snowman Cookies myself, I’ve read that you can freeze them if you:
Place them in a food-safe airtight container separated with parchment paper. Do NOT open the container while thawing: (This prevents condensation from ruining the icing and candy details.) Once fully thawed, open and serve.
***If you try this method, please let me know how it works – results may vary, and I can’t guarantee perfection. I just wanted to let you know.

🎁 How to Gift Them
These cookies give instant Christmas cheer, so here’s what works best:
- Place 2–4 cookies in a clear cellophane bag
- Add a little “snow” (shredded coconut or white crinkle paper)
- Tie with ribbon
OR
Layer them flat in a bakery box with parchment between rows so no hats get decapitated.
And that’s it … the cutest little cookie meltdown you’ll ever bake. These Melted Snowman Sugar Cookies always get a laugh, a smile, or at least an “oh my god, look at his little hat!” every time they hit the table.
If you end up making a batch, I’d love to hear how your snowmen turned out! (Charming, derpy, or full-on dramatic meltdown vibes, they all count.) Drop a comment, share a photo, or just tell me the best reaction you got from someone!
Happy baking, and may your holiday season be full of sugar, cozy vibes, and zero cookie-related catastrophes. 🎄
~Joanne
Melted Snowman Sugar Cookies Recipe
These adorable Melted Snowman Sugar Cookies start with premade dough and come together with a simple icing and candy decorations. Fun, easy, and perfect for holiday gifting!
Ingredients
- 1 (16 oz) package premade sugar cookie dough
- 2 cups powdered sugar
- 3 - 4 tablespoons milk (plus more as needed)
- 12 Mini Reese’s Cups, halved (or Rolos/Oreos)
- 48 mini chocolate chips (eyes)
- 24 orange sprinkles (noses)
- 48 Mini M&Ms (buttons)
Instructions
- Bake the Cookies: Preheat the oven as directed on your cookie dough package. Line a baking sheet with parchment paper and space the dough pieces 2–3 inches apart. Bake according to the package instructions until lightly golden. Cool on the sheet for 2 minutes, then move to a rack to cool completely.
- Make the Icing: In a small bowl, whisk powdered sugar with 3 tablespoons milk until thick but pourable. Add more milk, a teaspoon at a time, if needed. The icing should slowly ooze across the cookie, not run off instantly.
- Icing the Cookies: Place the cooled cookies on a rack set over a tray. Spoon icing into the center of each cookie and let it naturally spread. For a more “melty” look, set the rack on top of a slightly warm cookie sheet (optional).
- Decorate: While the icing is still soft, press half a Reese’s Cup near the top for the hat, miniature chocolate chips for eyes, an orange sprinkle for the nose, and Mini M&Ms for buttons. Tilt hats or mix colors for personality.
- Set: Allow cookies to sit 20–30 minutes or until the icing firms up enough for handling or packaging.
Notes
Nutrition Information:
Yield: 24 Serving Size: 1Amount Per Serving: Calories: 1792Total Fat: 107gSaturated Fat: 61gUnsaturated Fat: 45gCholesterol: 3mgSodium: 58mgCarbohydrates: 244gFiber: 20gSugar: 210gProtein: 16g
All nutritional information is based on third-party calculations and is only an estimate. Each recipe and nutritional value will vary depending on the brands you use, measuring methods, and portion sizes per household.